How to Apply Grout Stain on Your Tiles
If you’re thinking about using grout stain, you’ve come to the right place.
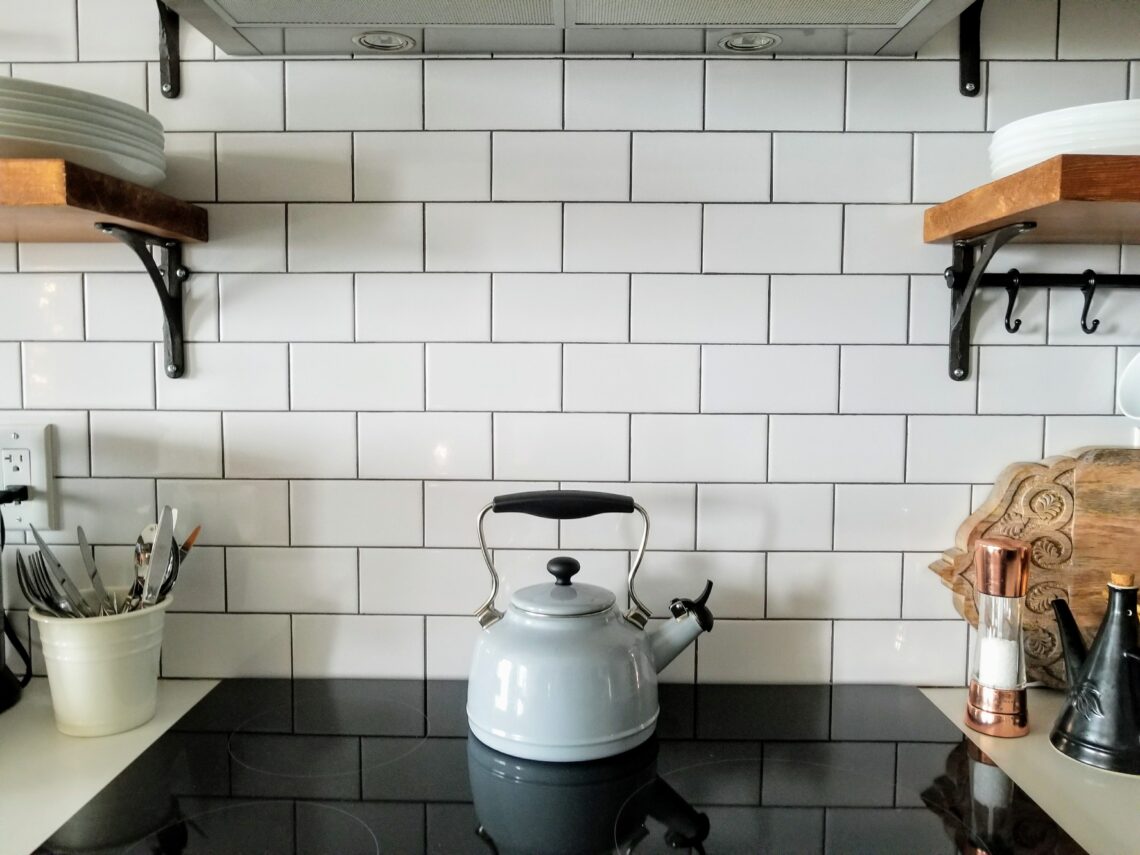
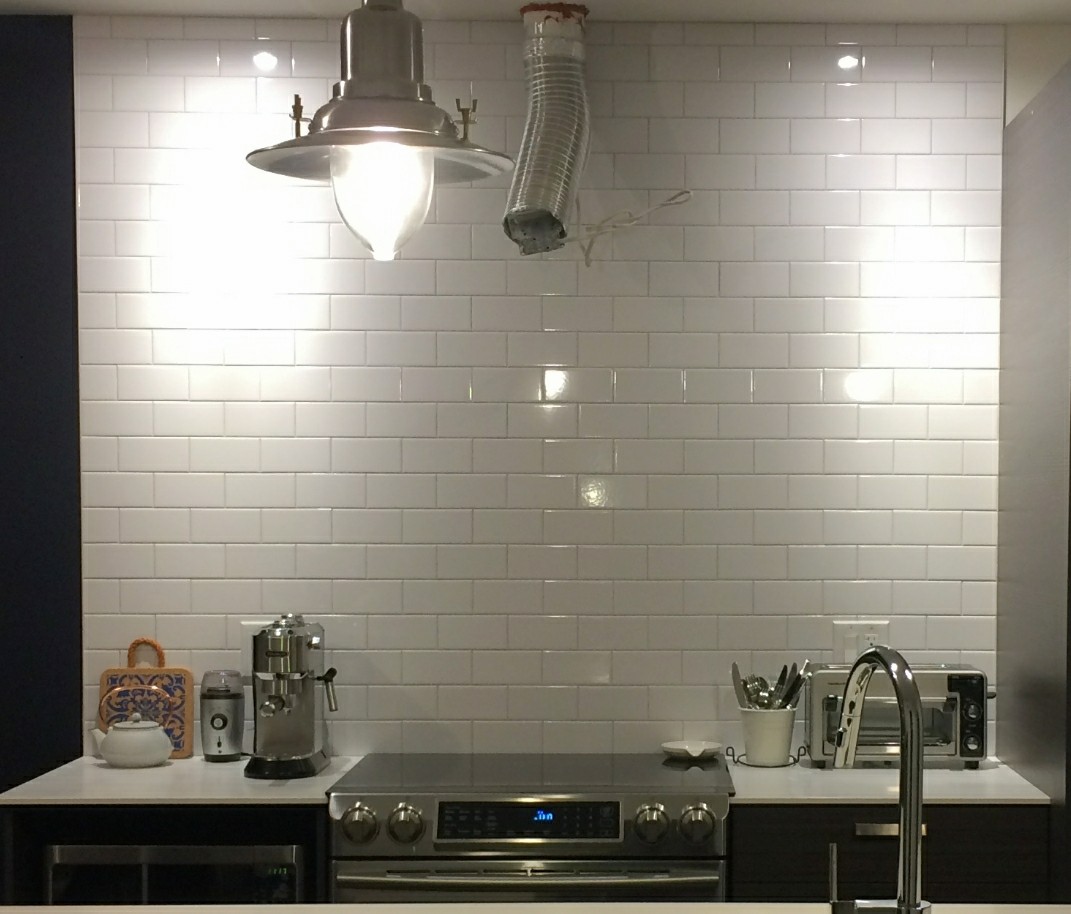
Let me tell you a little story about the grout in our condo. Even before our condo was built, we had asked for dark grey grout for our kitchen and bathroom tiles.
“No problem,” they told us. No. Problem.
Low and behold, they delivered the condo with light grey grout – everywhere. Some might say it’s not the end of the world. But to me, a design perfectionist, it was.
I had two options on my hands:
- They could tare down the tiles and redo the whole thing from scratch, or
- They could provide dark grey grout stain and I could do the work myself
I chose option b, because I’m an impatient lunatic. But also because I didn’t want them to make a huge mess in our brand new home.
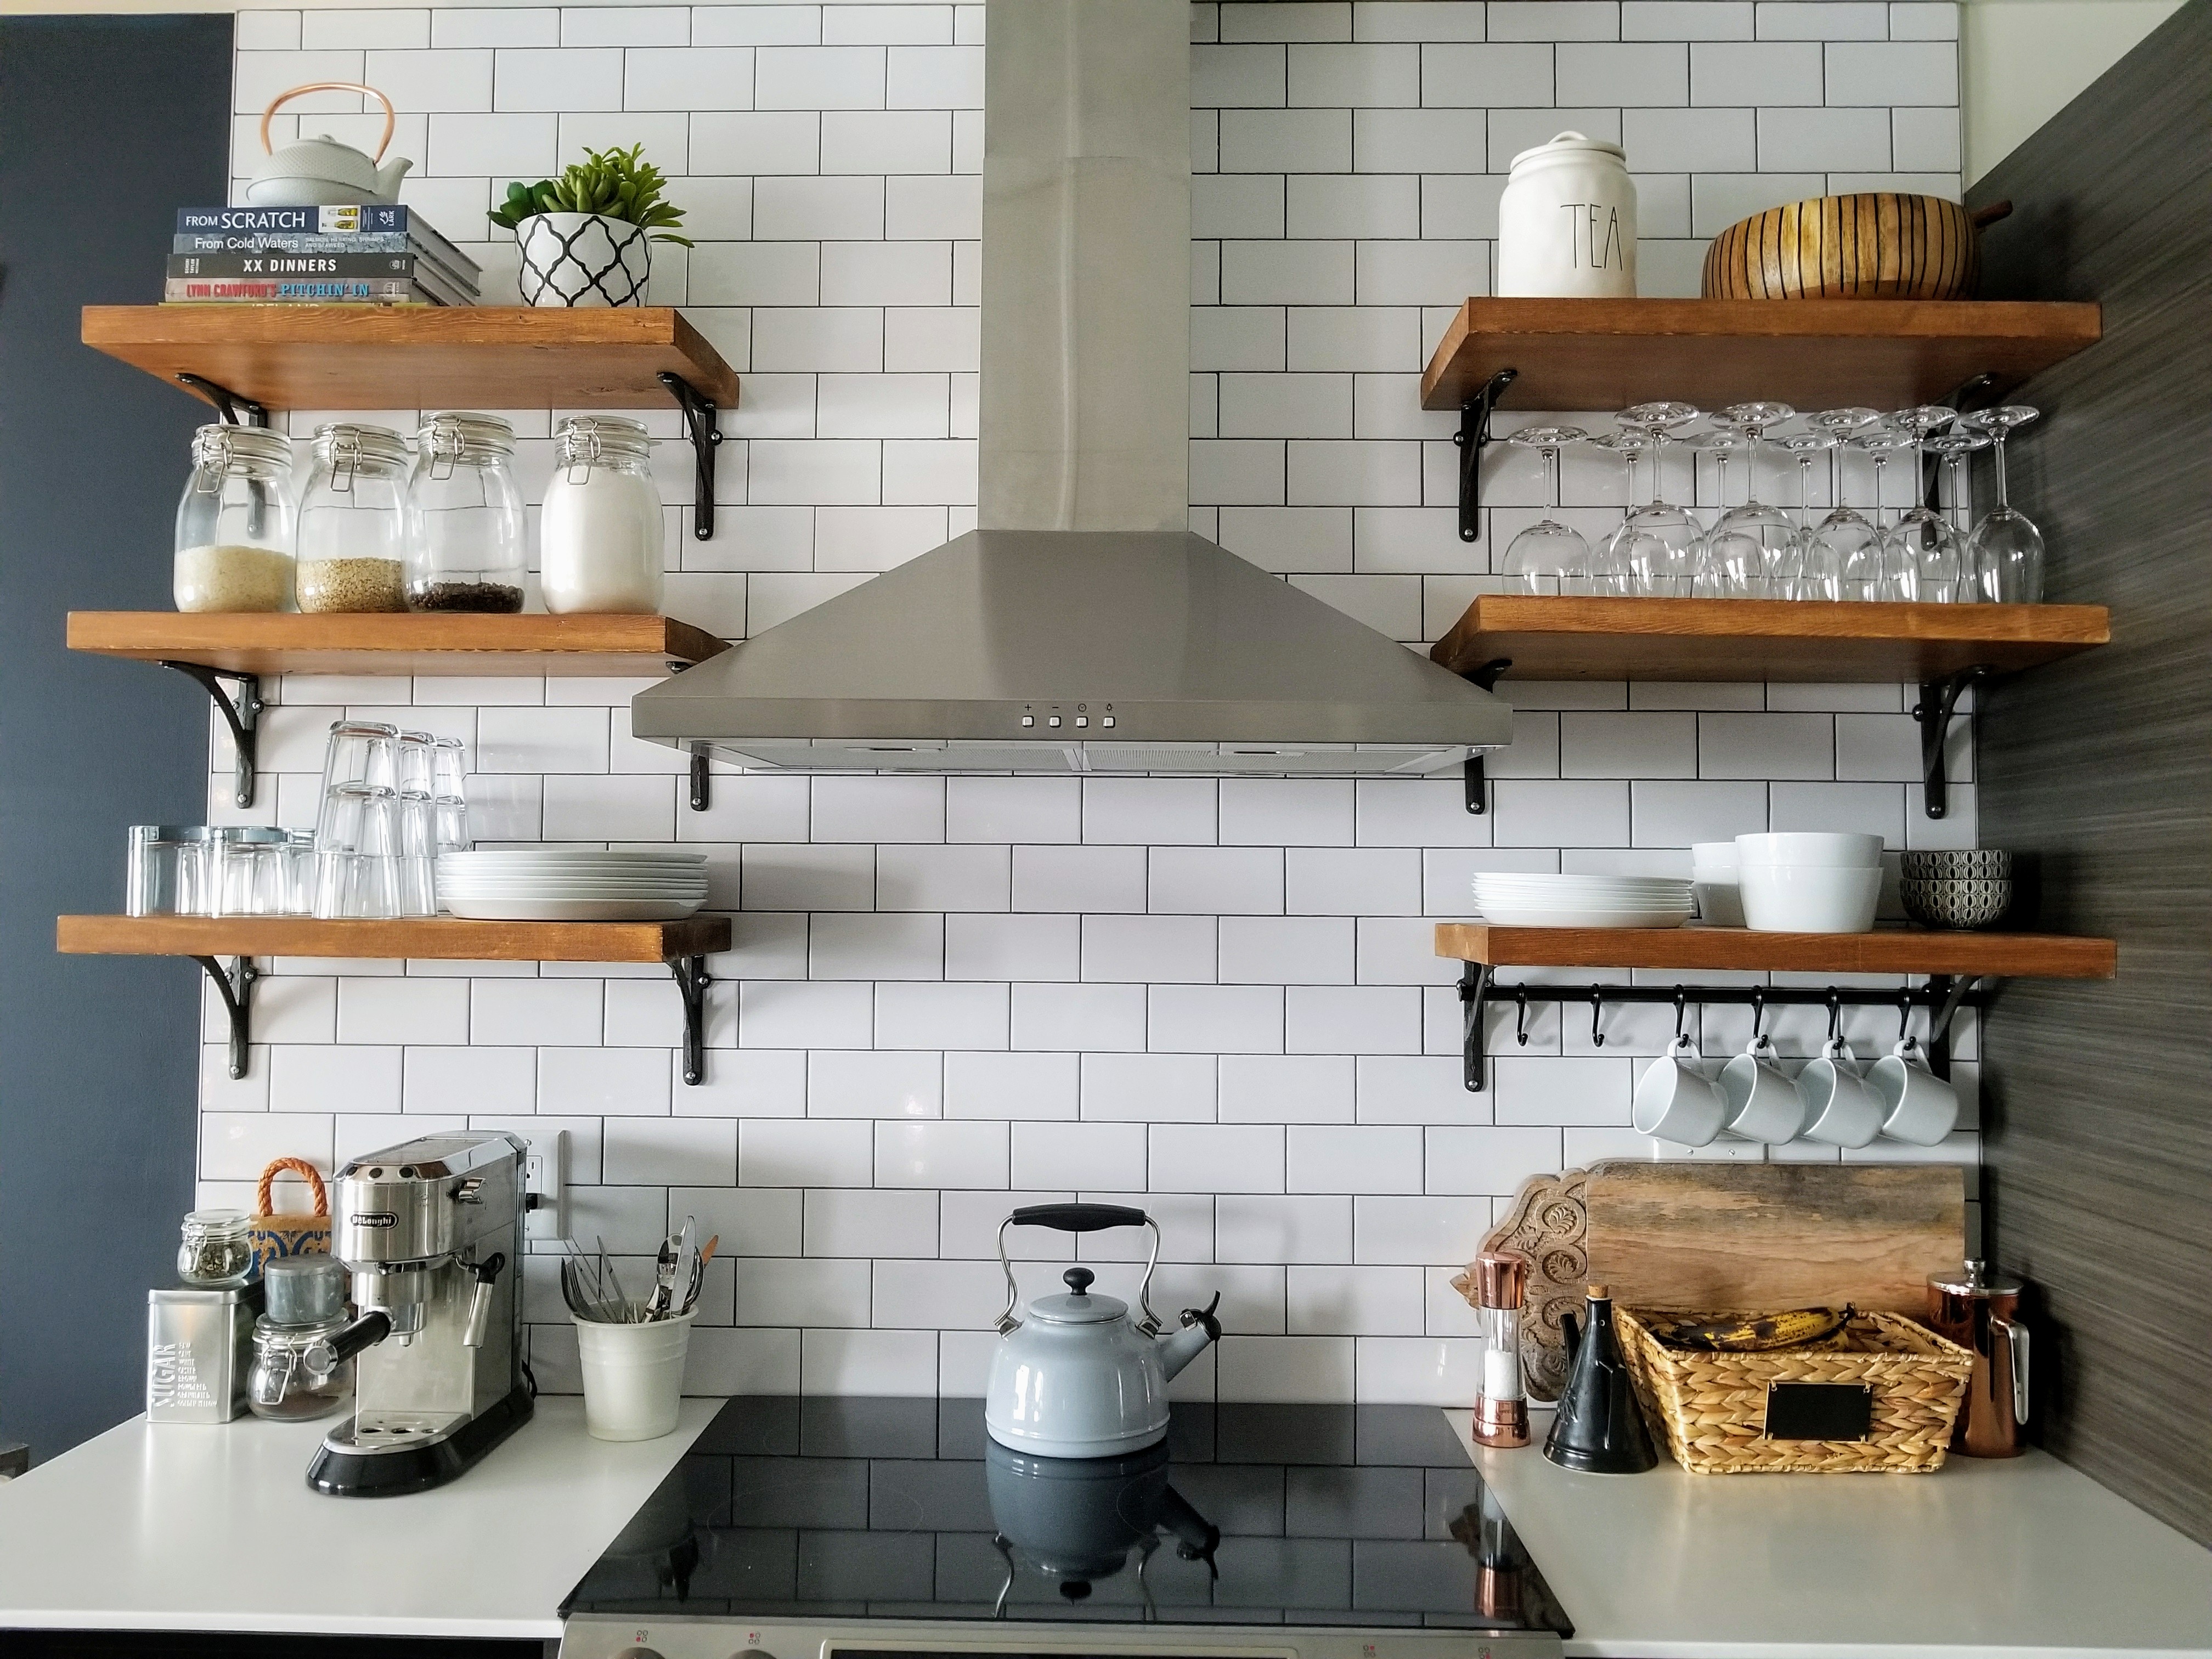
And I’m so glad I did, because it turned out great.
What you’ll need
- Grout stain
- Foam brush
- Container
- Bucket
- Rags
- Patience
How to use grout stain on your tiles
Step 1 – Clean the existing grout
Before you begin, you want to make sure your existing grout is clean. Do not skip this step – you do not want to stain dirty grout.
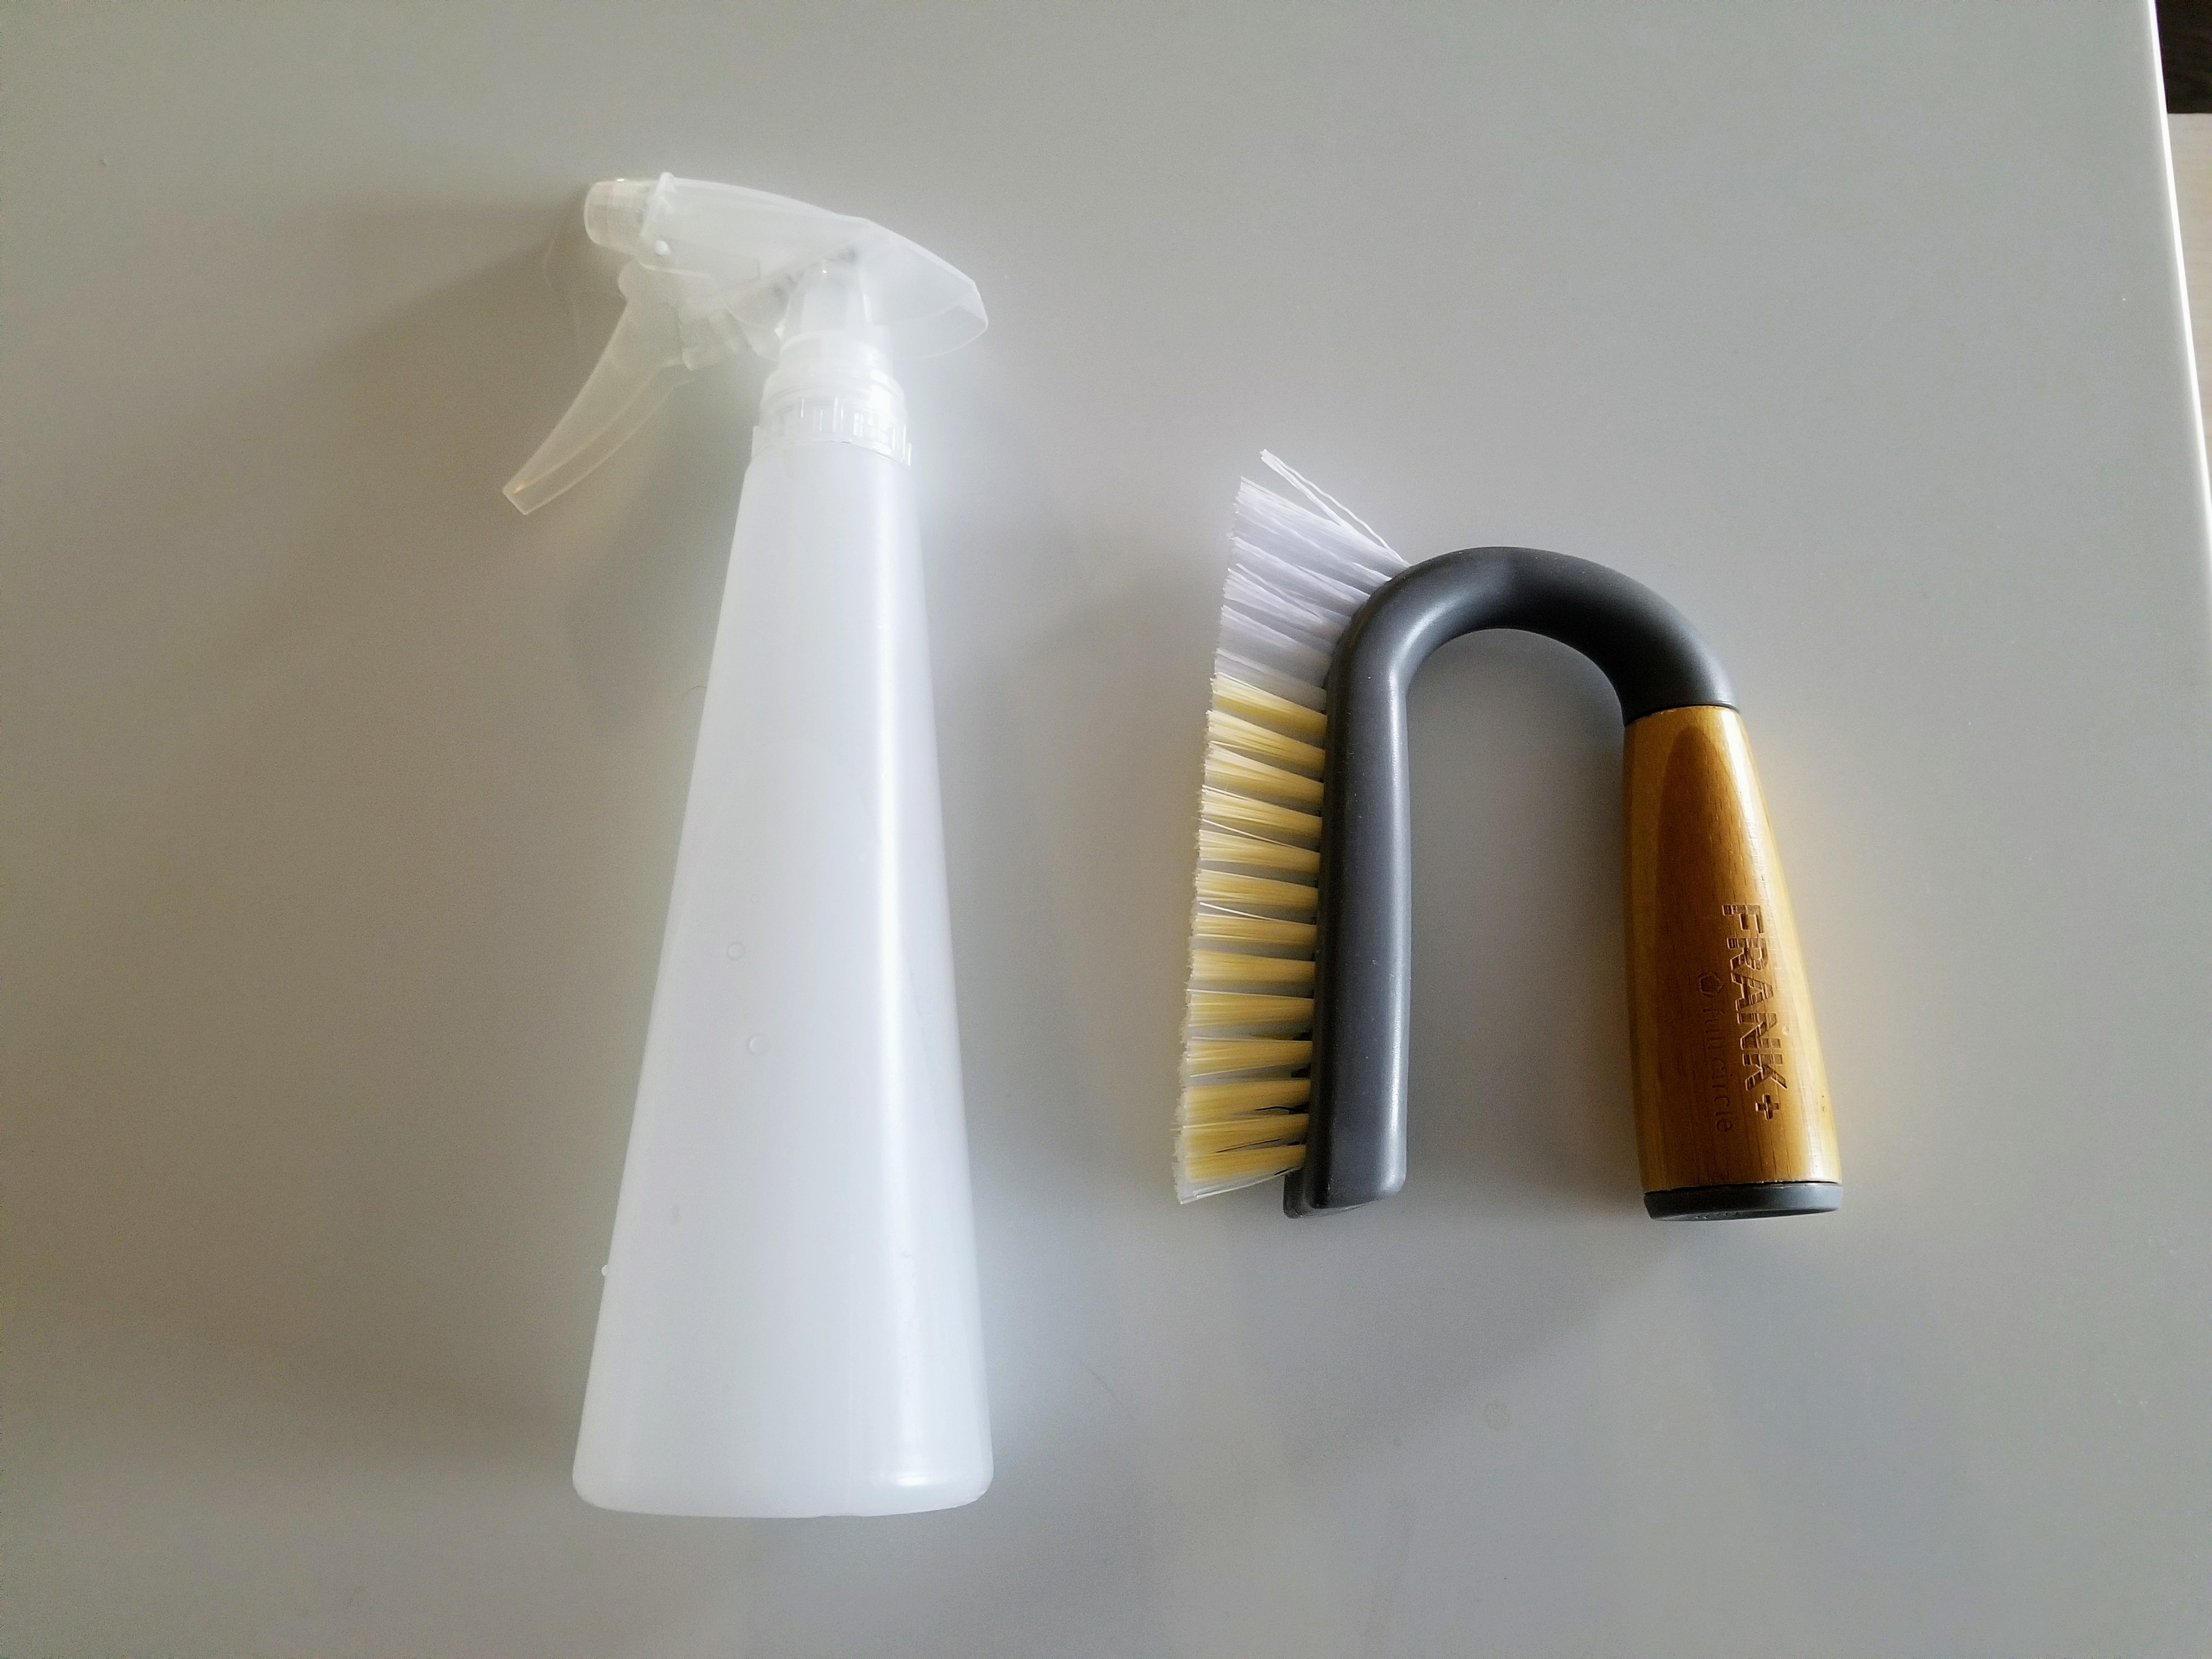
You can use a bristle brush and whatever solution you normally use to clean your grout. Let it all dry before you move on to the next step.
Step 2 – Apply the grout stain
Pour some of the grout stain in a container, dip your foam brush in it, and start applying. Try to stay within the lines as much as possible, but you’ll inevitably get some on the tiles.
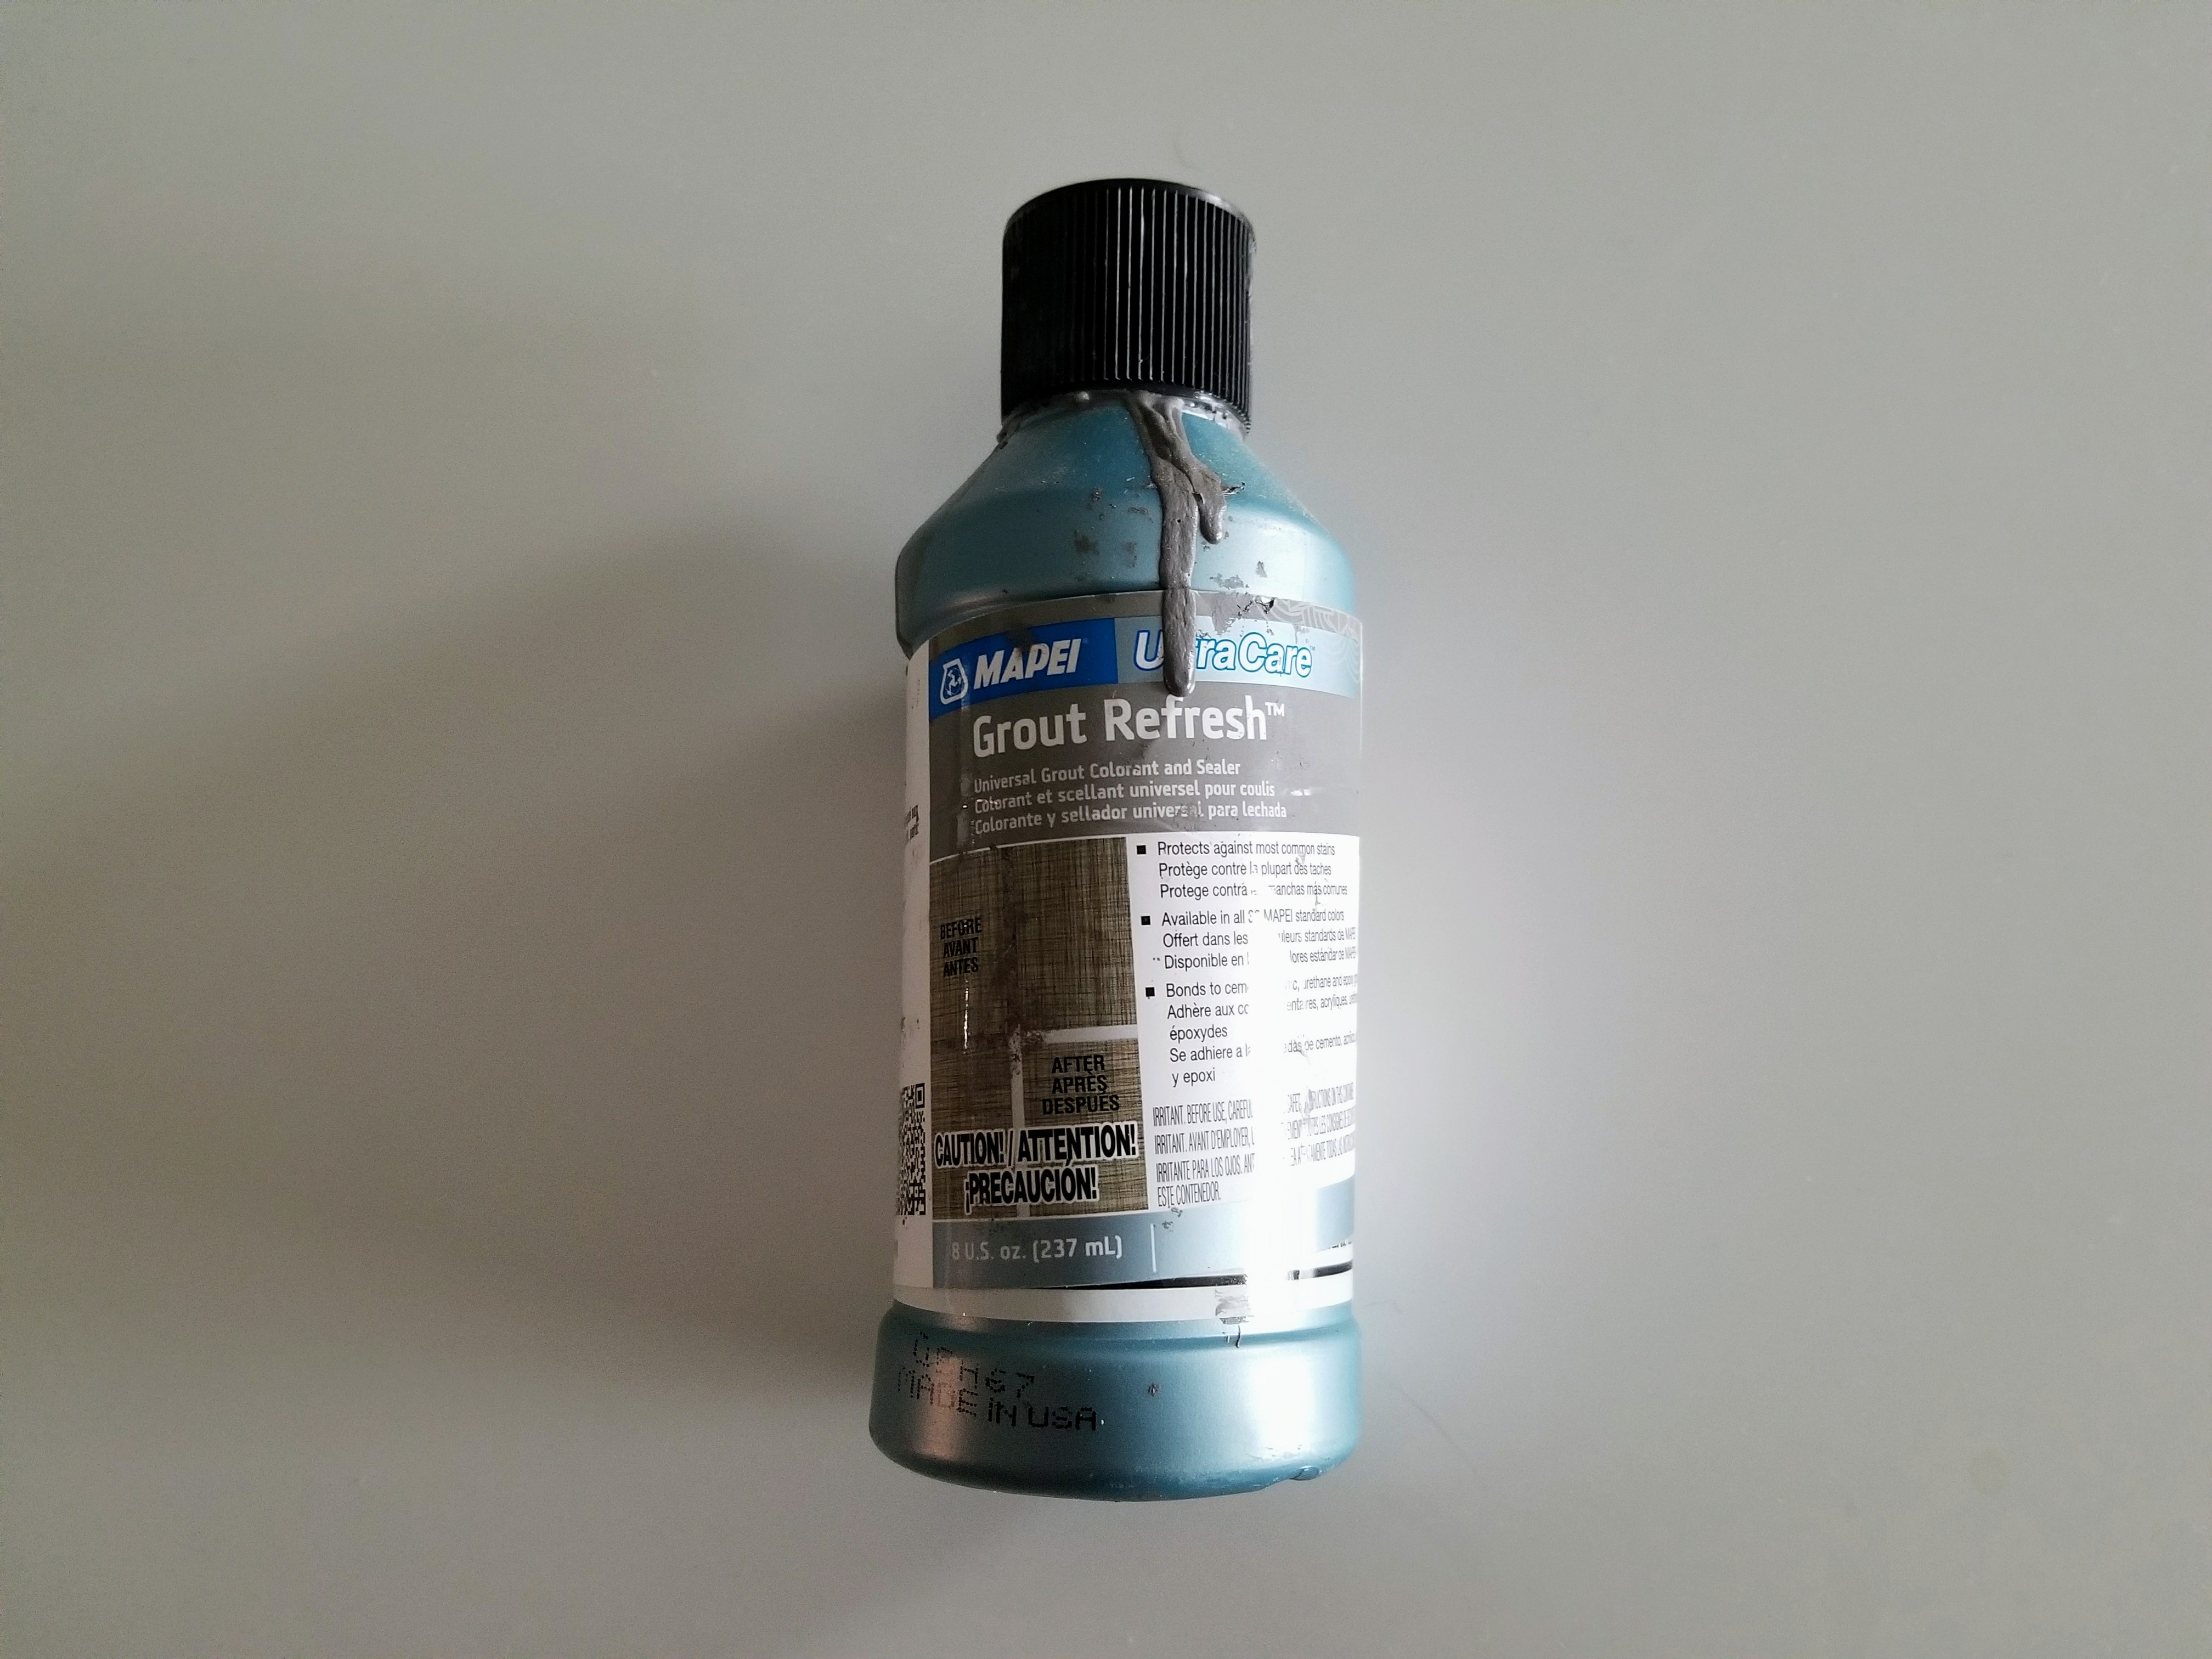
There’s not much else to it. Make sure you cover all the existing grout, otherwise you’ll have unstained patches in the end (which isn’t a huge deal since you can do touch-ups later on).
Step 3 – Clean the excess grout stain
Once you’ve completed a square foot or two, dip your rag in water, wring it, and rub the excess stain off the tiles. You will have to do this repeatedly, and you’ll need to replace the water in your bucket multiple times.
Do not leave the grout stain on the tiles too long, otherwise it will be harder to rub it off. Harder, but not impossible. You’ll just need to put more elbow grease into it.
Step 4 – Let it dry
Now that you’ve applied the grout stain everywhere and have cleaned up the excess stain off your tiles, you need to let everything dry.
Try not using the area for at least 24 hours. Read the instructions on the bottle for best results.
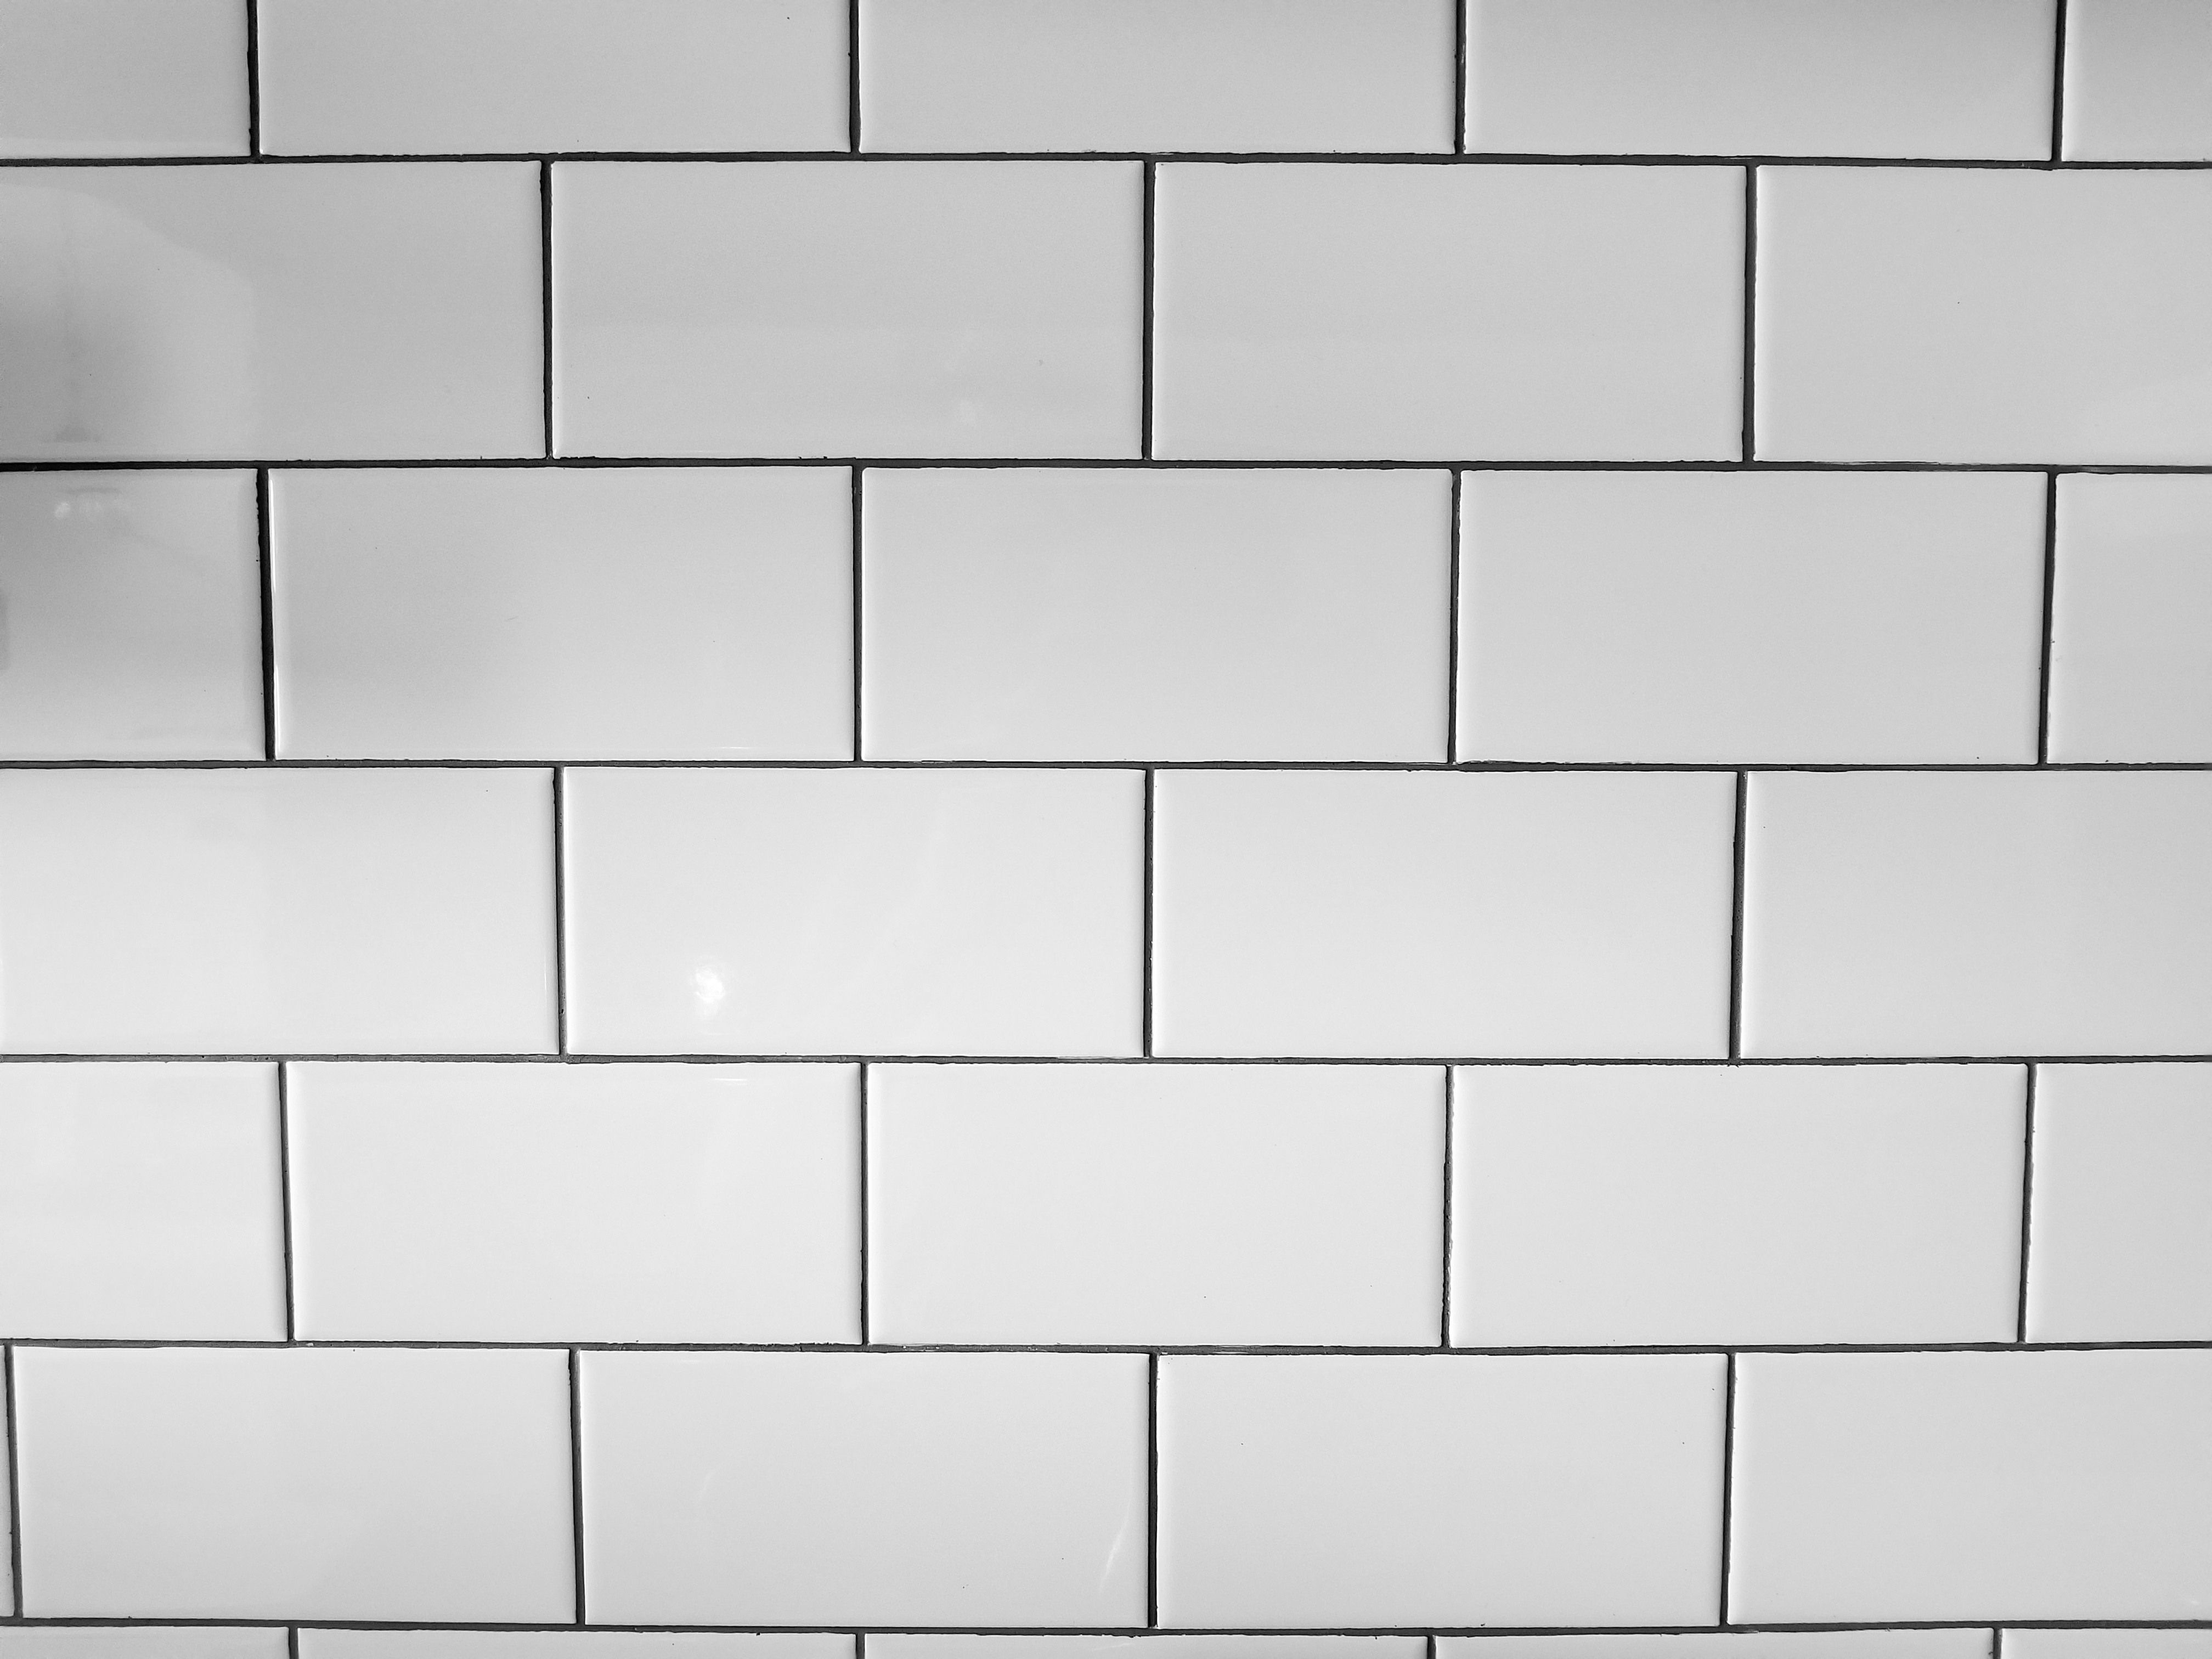
Before & after
Note: I used a bottled grout stain and a foam brush because I couldn’t find the color I was looking for in a grout stain marker. You can try out the marker if you find it in the right color, but make sure it has a sealant and is mold resistant.
Want more DIY ideas?


2 Comments
Hovig
Yeah Agreed it looks way better with the new stain!
smallspacedesigner
Thanks 🙂 Makes the tiles pop out more!