Easy Raised Garden Bed for Beginners | DIY Vegetable Garden
Before I get into this easy raised garden bed idea that you can literally put together in under two hours, here’s a little back story on how this project came about.
You see, I’ve always wanted to grow my own vegetables and be somewhat self-sustainable, at least in the summer months.
I’ve dreamt of living off the land, somewhere in the mountains, but it just isn’t feasible for my family–at least for now. So I decided to recreate a tiny piece of that type of lifestyle right here in the city.
When we were looking to buy our house, one of my main requirements was a large enough backyard where we could have an outdoor dining and living area, plus enough room for multiple raised garden beds where we could grow a ton of veggies.
We found a perfect little bungalow in late 2020, and I impatiently waited for the following spring to come along so I could finally build my garden.
I did a ton of research online and many DIY raised garden bed ideas were overly complicated for nothing.
So I decided to use logic (we’ve worked with wood before, how hard could it be?) and came up with a super easy plan… that actually worked!
Time spent building our raised garden bed: 1.5 hours*
*Including ground prep.
What is a raised garden bed?
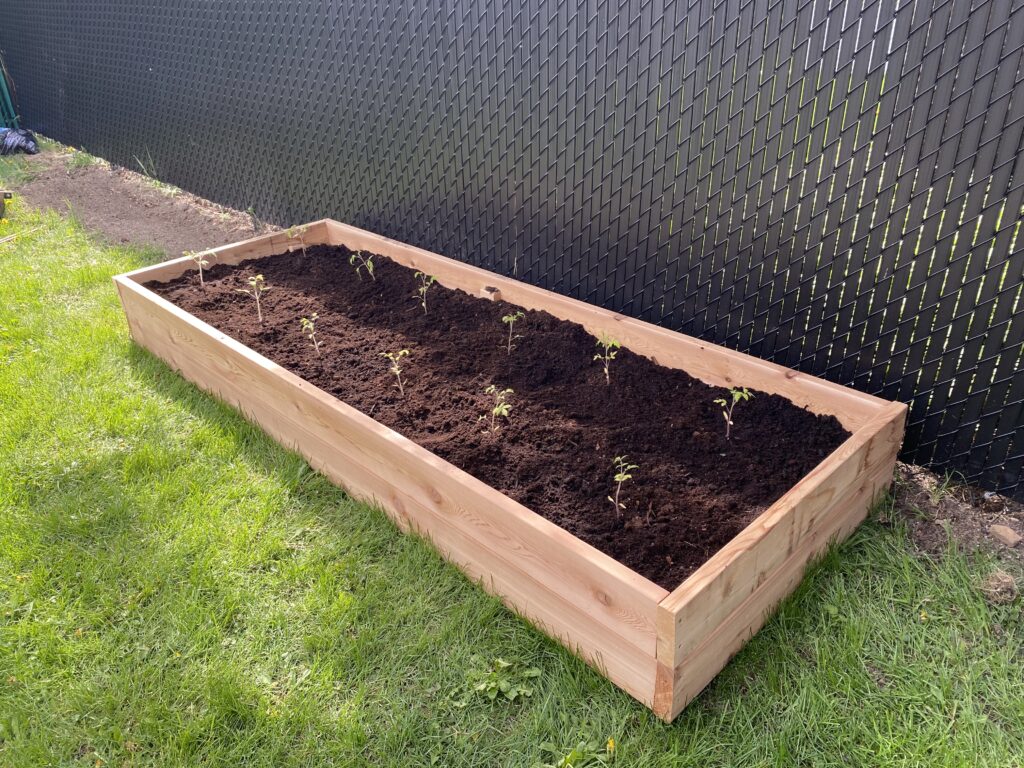
A raised garden bed usually consists of an elevated wooden box frame that you build on top of your existing soil (the ground) and where you can plant your vegetables/flowers. They are typically 6 to 12 inches high, 3 to 6 feet wide, and 6 to 8 feet long.
What are the benefits of a raised garden bed?
There are many benefits to having a raised garden bed vs. planting directly in the ground. Although it’ll cost more up front, you can benefit from it for many, many years.
A raised garden bed offers:
-
- Easier accessibility and less back strain
- Better quality soil and drainage
- Fewer weeds and critters
- No soil compaction from foot traffic
- Warmer soil earlier in the season resulting in a longer growing season
- Better aesthetics
Tools & materials to build an easy raised garden bed
You’ll be surprised at how little you actually need for this easy raised garden bed project. Most of the tools you probably already own, and the materials can be picked up at your local hardware store.
Note that I built a double-decker garden bed, meaning I mounted one on top of the other to make it extra raised.
Tools
- Measuring tape
- Pencil
- Square or ruler (to trace the cut lines)
- Drill
- Saw
Materials
- Cedar planks or pressure-treated wood*
- I got four 2x6x8’ boards for the length (to double up) and
- Two 2x6x6’ boards for the width (to double up) and
- One 2x6x6’ board to fasten the double-decker garden bed together
- Box of 8×3 deck screws (you’ll need about 16 screws)
- Box of 8×2-½” deck screws (you’ll need about 16 screws)
- Gardening soil (~8 bags)
- Compost (~8 bags)
*I used cedar planks for this garden bed, but I have another one made out of pressure treated wood, and this article put my mind at ease about the safety concerns.
Cutting the wood to size
If you’re going with a standard 6 or 8 foot-long garden bed, you only need to make cuts for the joining side panels (width).
The ideal width of a raised garden bed is 3 feet. That’s enough space for you to maximize on planting (especially if you’re planning on doing square foot gardening) while still being able to reach all sides comfortably.
So cut your boards to 3 feet each (you’ll need 4 boards of 3 feet each if you’re doubling up like I did).
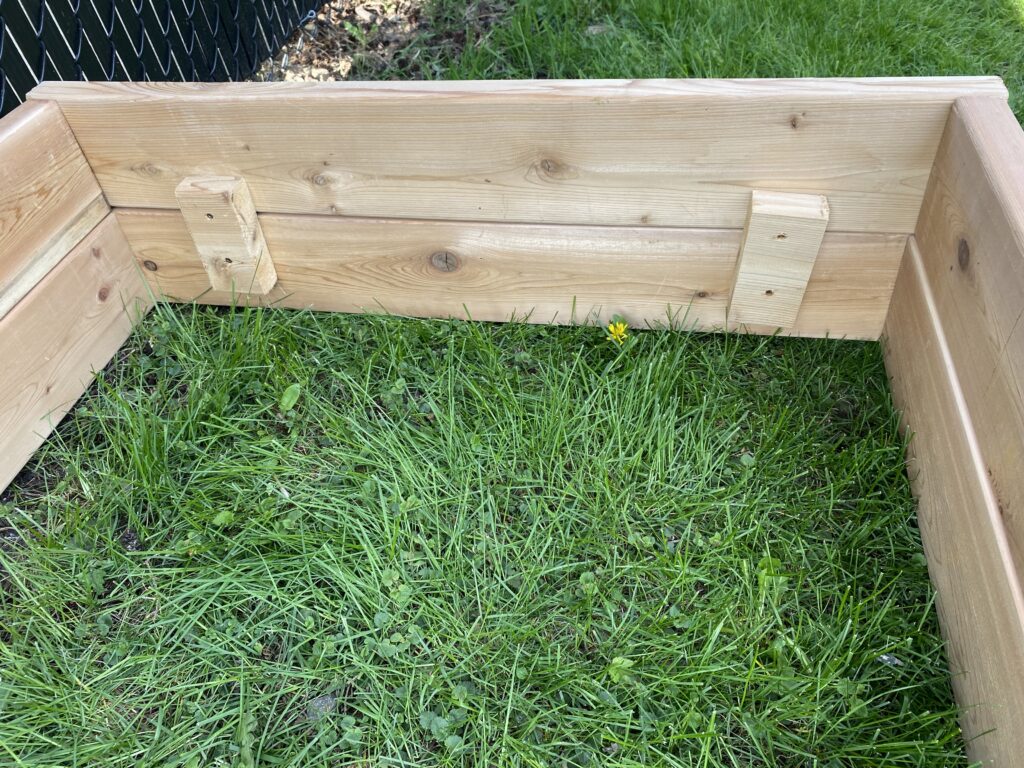
You’ll also have to make cuts for the pieces of wood that will fasten your two garden beds on top of each other. We cut the remaining 2x6x6’ board into eight mini blocks of about 3 inches each (you’ll see these in the pics below).
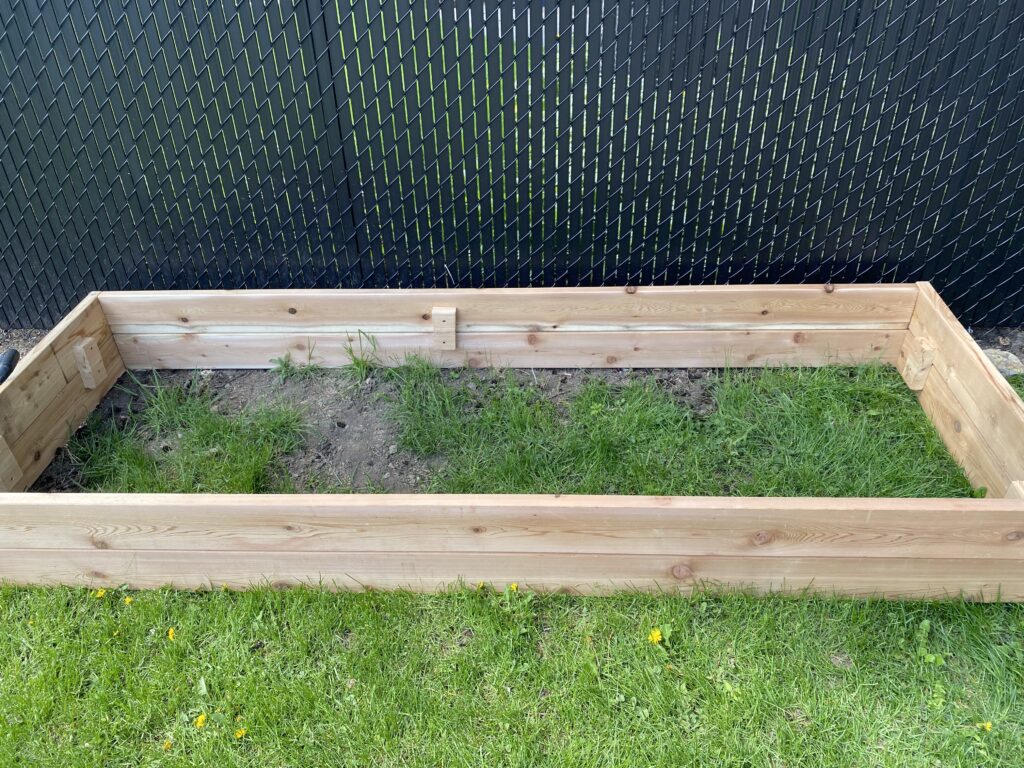
Easy raised garden bed assembly
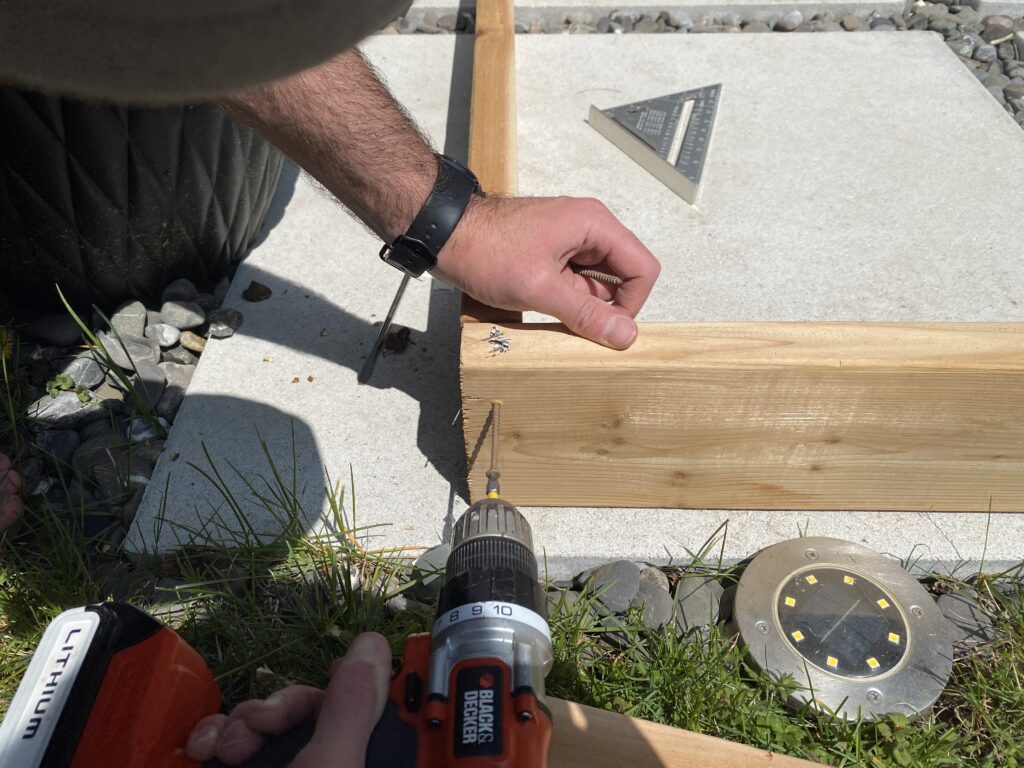
This should go fairly quickly, and it’s easiest if you assemble the boards on a hard, level surface (like a patio).
Simply hold the corners of the boards together and drill in two 3×8” deck screws per corner. We didn’t bother with pilot holes because cedar is a soft wood and the screws went in easily without any cracking.
That’s literally it.
And if you’re doubling up like we did, build a second box (rinse & repeat previous steps), place the two boxes on top of each other, and fasten them with the small pieces of wood you cut using two 8×2-½” deck screws per piece.
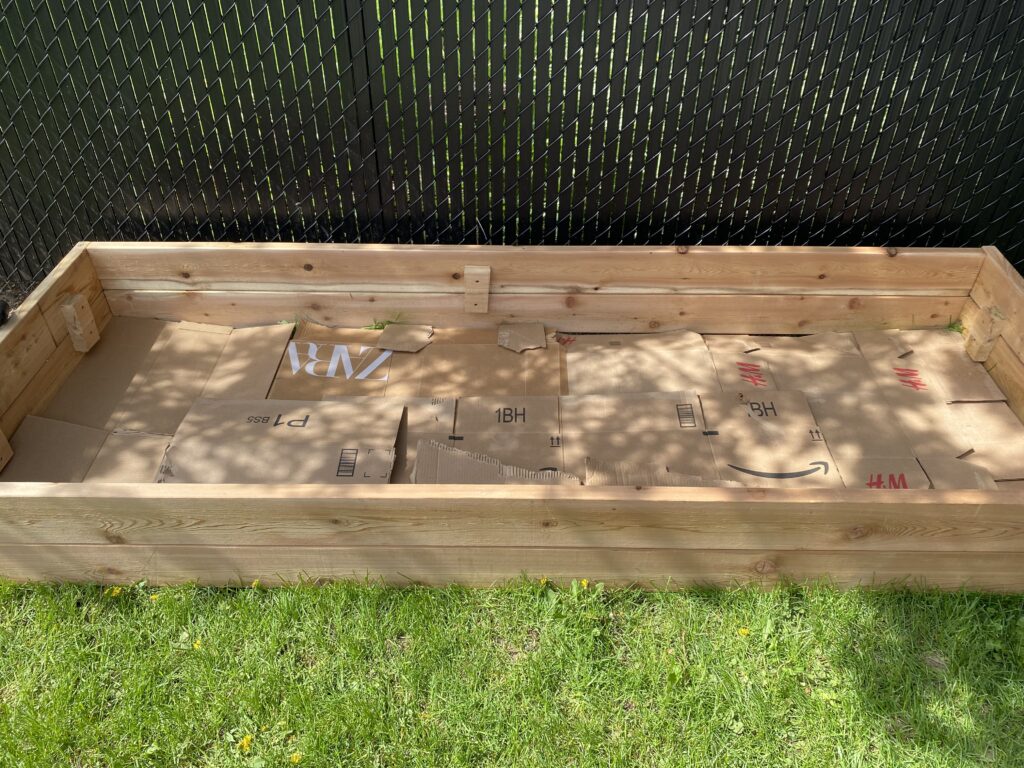
Ground preparation
First of all, hopefully the area you’ve chosen is (mostly) level. If not, you’ll have to go with option 2 below so you can level it out.
Here are the two options you have to prepare the ground for your garden bed:
- Lay flattened cardboard boxes to cover the grass (fastest/easiest option, but make sure you remove all tape & stickers)
- Remove the grass in that area with a spade or flat head shovel (more time-consuming, but not that difficult).
Gardening soil, compost & debris
I mentioned earlier that you’ll need roughly 8 bags of gardening soil and 8 bags of compost. This is an approximation, because I can’t remember precisely how many I used.
The ratio should be 1:1 (one bag of soil to one bag of compost).
To note: I also used a lot of dried leaves, thick branches, and debris from my garden to fill the bottom of my raised garden bed to save on buying extra soil.
This is called the hugelkultur gardening method. I highly recommend it.
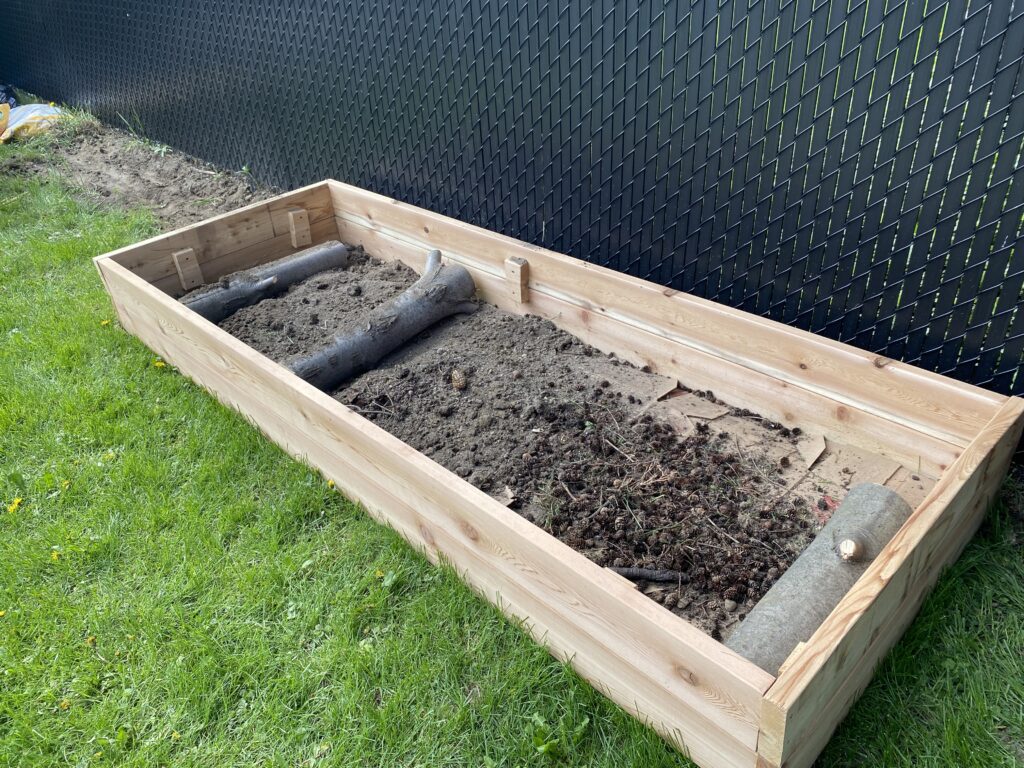
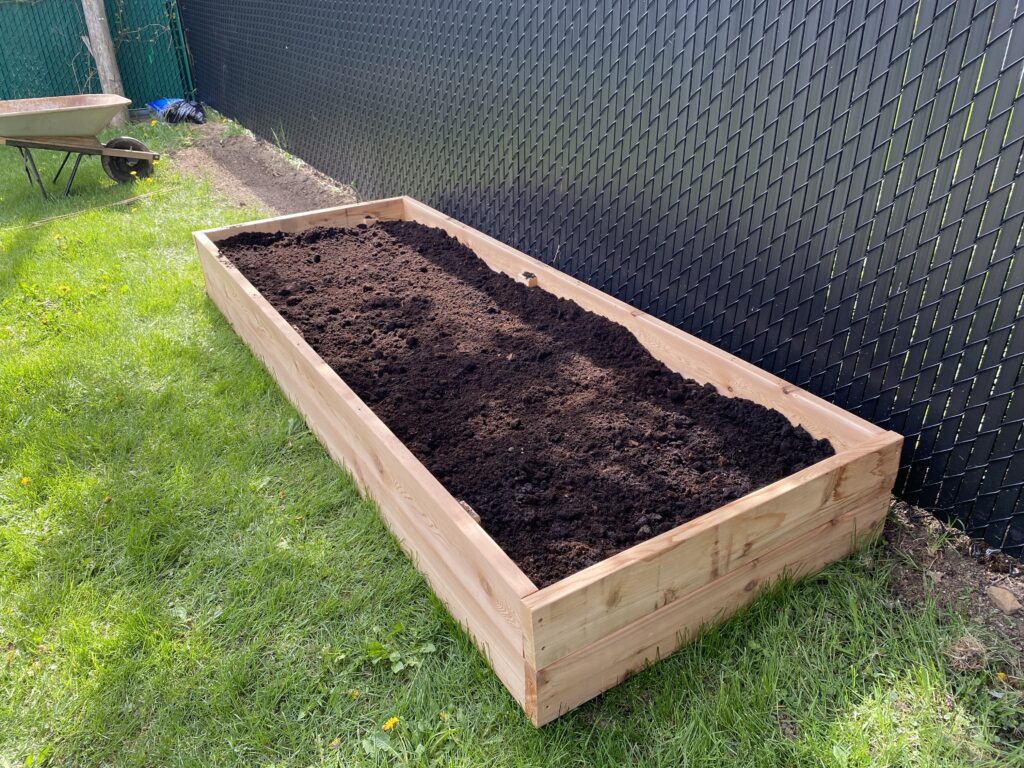
Once you’ve filled your garden bed, you can use your hand to level out the soil.
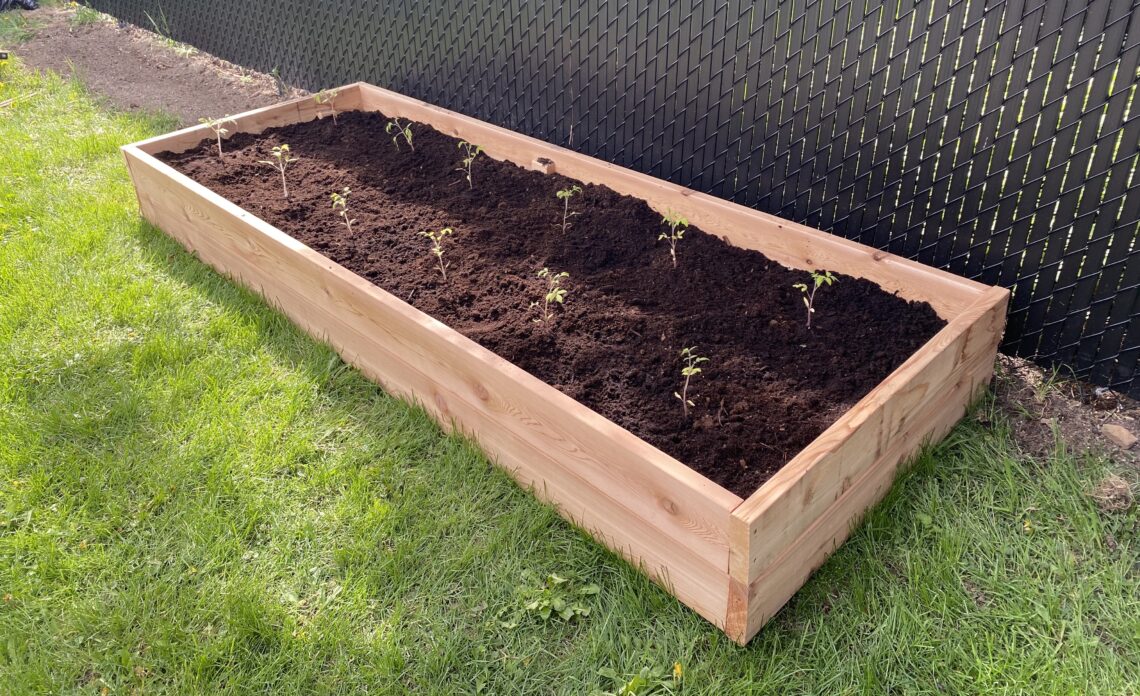
And there you have it! The easy raised garden bed of your dreams, in under two hours.
Final tip: Once you plant your veggies, water the soil deeply. If you read the soil packaging, it’ll give you clear instructions on how often to water the soil for the first few days for best results.

You May Also Like
DIY Organic Cleaning Products for Your Home
How to Build and Mount Kitchen Shelves