How to Build a Wooden Bench with Pipe Legs
If you’re into DIY’ing and you like industrial design, you’re in for a treat. Building an industrial bench is one of the easiest projects you can take on. It doesn’t take much time and it’s great for beginners because it helps you ease into the world of woodworking.
Building an industrial bench with pipe legs was the first project I completed, and I was so pleased with the results. It only took a few hours, required minimal effort, and didn’t cost much.
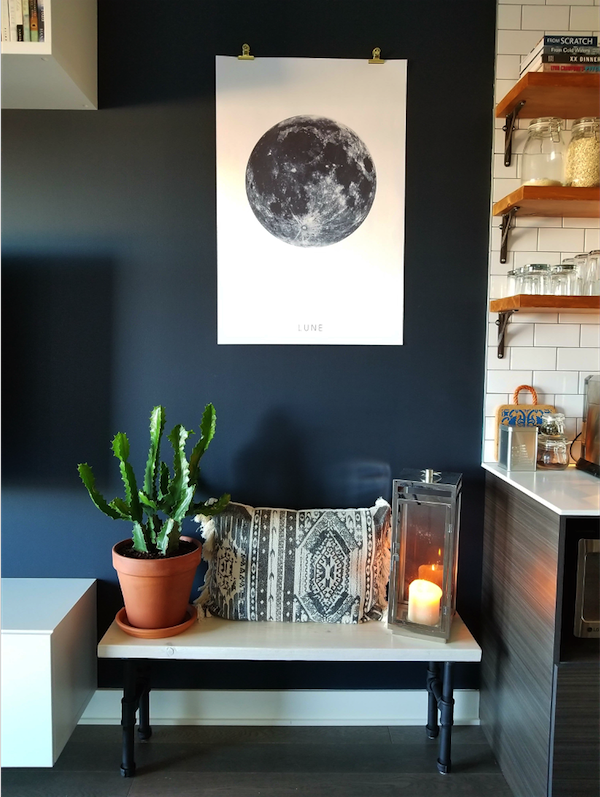
One of the awesome things about a bench with pipe legs is that the height is easily adjustable. Whether you’re going to use it in your hallway or for your dinner table, it’s always great to have the option to adjust the height of your furniture.
Pipe legs are very sturdy, which means they can handle a lot of weight, plus they’re fairly cheap and can be found at any hardware store.
Most importantly, they’re super trendy and will make your house (and by extension – you) look badass.
Alright, let’s get down to business.
Materials used
- Pine wood (1.5″x11″x44″)
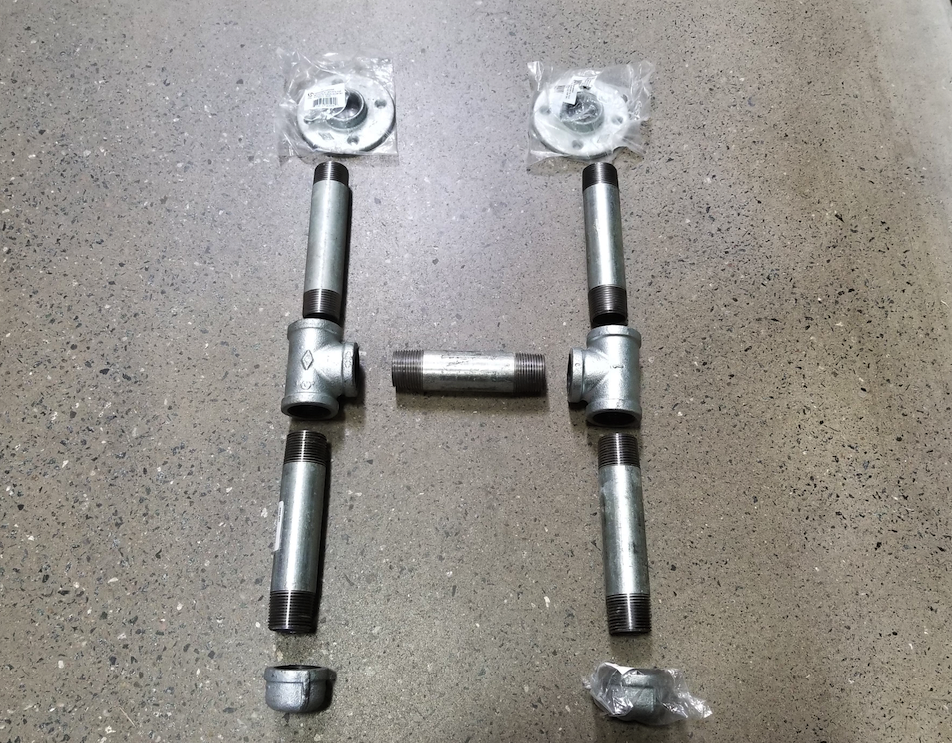
- Galvanized pipes
- 8 times 1″x6″ nipples (fun!)
- 2 times 1″x5″ nipples
- 4 times 1″ tees
- 4 times 1″ flanges
- 4 times 1″ end caps
- SamaN whitewash stain
- Clear satin polyurethane (Varathane)
- Staining kit
- Wood screws
- Sandpaper
- Black water-based spray paint
Note: “nipple” is the term for these pipes, “tees” are connectors, and “flanges” are the round disks. The 1″ represents the diameter of the pipes. Don’t worry, you’ll see an image of the pipes soon.
Tools used
- Power sander
- Drill
- Paintbrush
Steps on how to build an industrial bench with pipe legs
Step 1: Cutting and sanding the wood
The size of your bench depends on what you’ll be using it for. Mine was originally meant to be used as a seat for my dining table (now it’s multi-purpose), and it can seat 2 adults comfortably.
You can get your board cut to size at the store, or you can do it yourself if you have a saw. Either way works.
Once cut, it’s time to sand. We used a power sander to sand our benchtop because it makes the job faster, but if you don’t own one it’s absolutely doable by hand.
Tip: Sand all sides of the board even though the bottom will never show. You don’t want to get your pant leg caught on a rogue splinter. Or maybe you do, what do I know.
Step 2: Cleaning & assembling the pipes
“Why do I need to clean the pipes?” you ask. Let me tell you.
Galvanized pipes are coated with a protective zinc coating + some sort of oil that prevents them from corroding and rusting. Remember, they’re technically meant to be used as actual pipes (duh).
You can wash off the oil by filling a bucket with a gallon of hot water, ¼ dish soap, and 1 cup of vinegar, and dipping an old brush or rag in the water and vigorously scrubbing the pipes.
You can now go ahead and assemble your pipe legs. The image below is pretty self-explanatory. You can tighten them by hand, Rambo.
Note: Some of these pics were taken after the project was completed (hence the plastic wrapping). Dragged my butt back to the store and took pics because I’m a people-pleaser.
Step 3: Spray painting the pipes (you can skip this if you want silver legs)
Another reason you need to clean your pipes is because the protective zinc coating won’t allow you to spray paint them properly. Damn you zinc!
You need to make sure you’ve removed the oil completely before spray painting, otherwise the paint will most likely come off. We don’t want that.
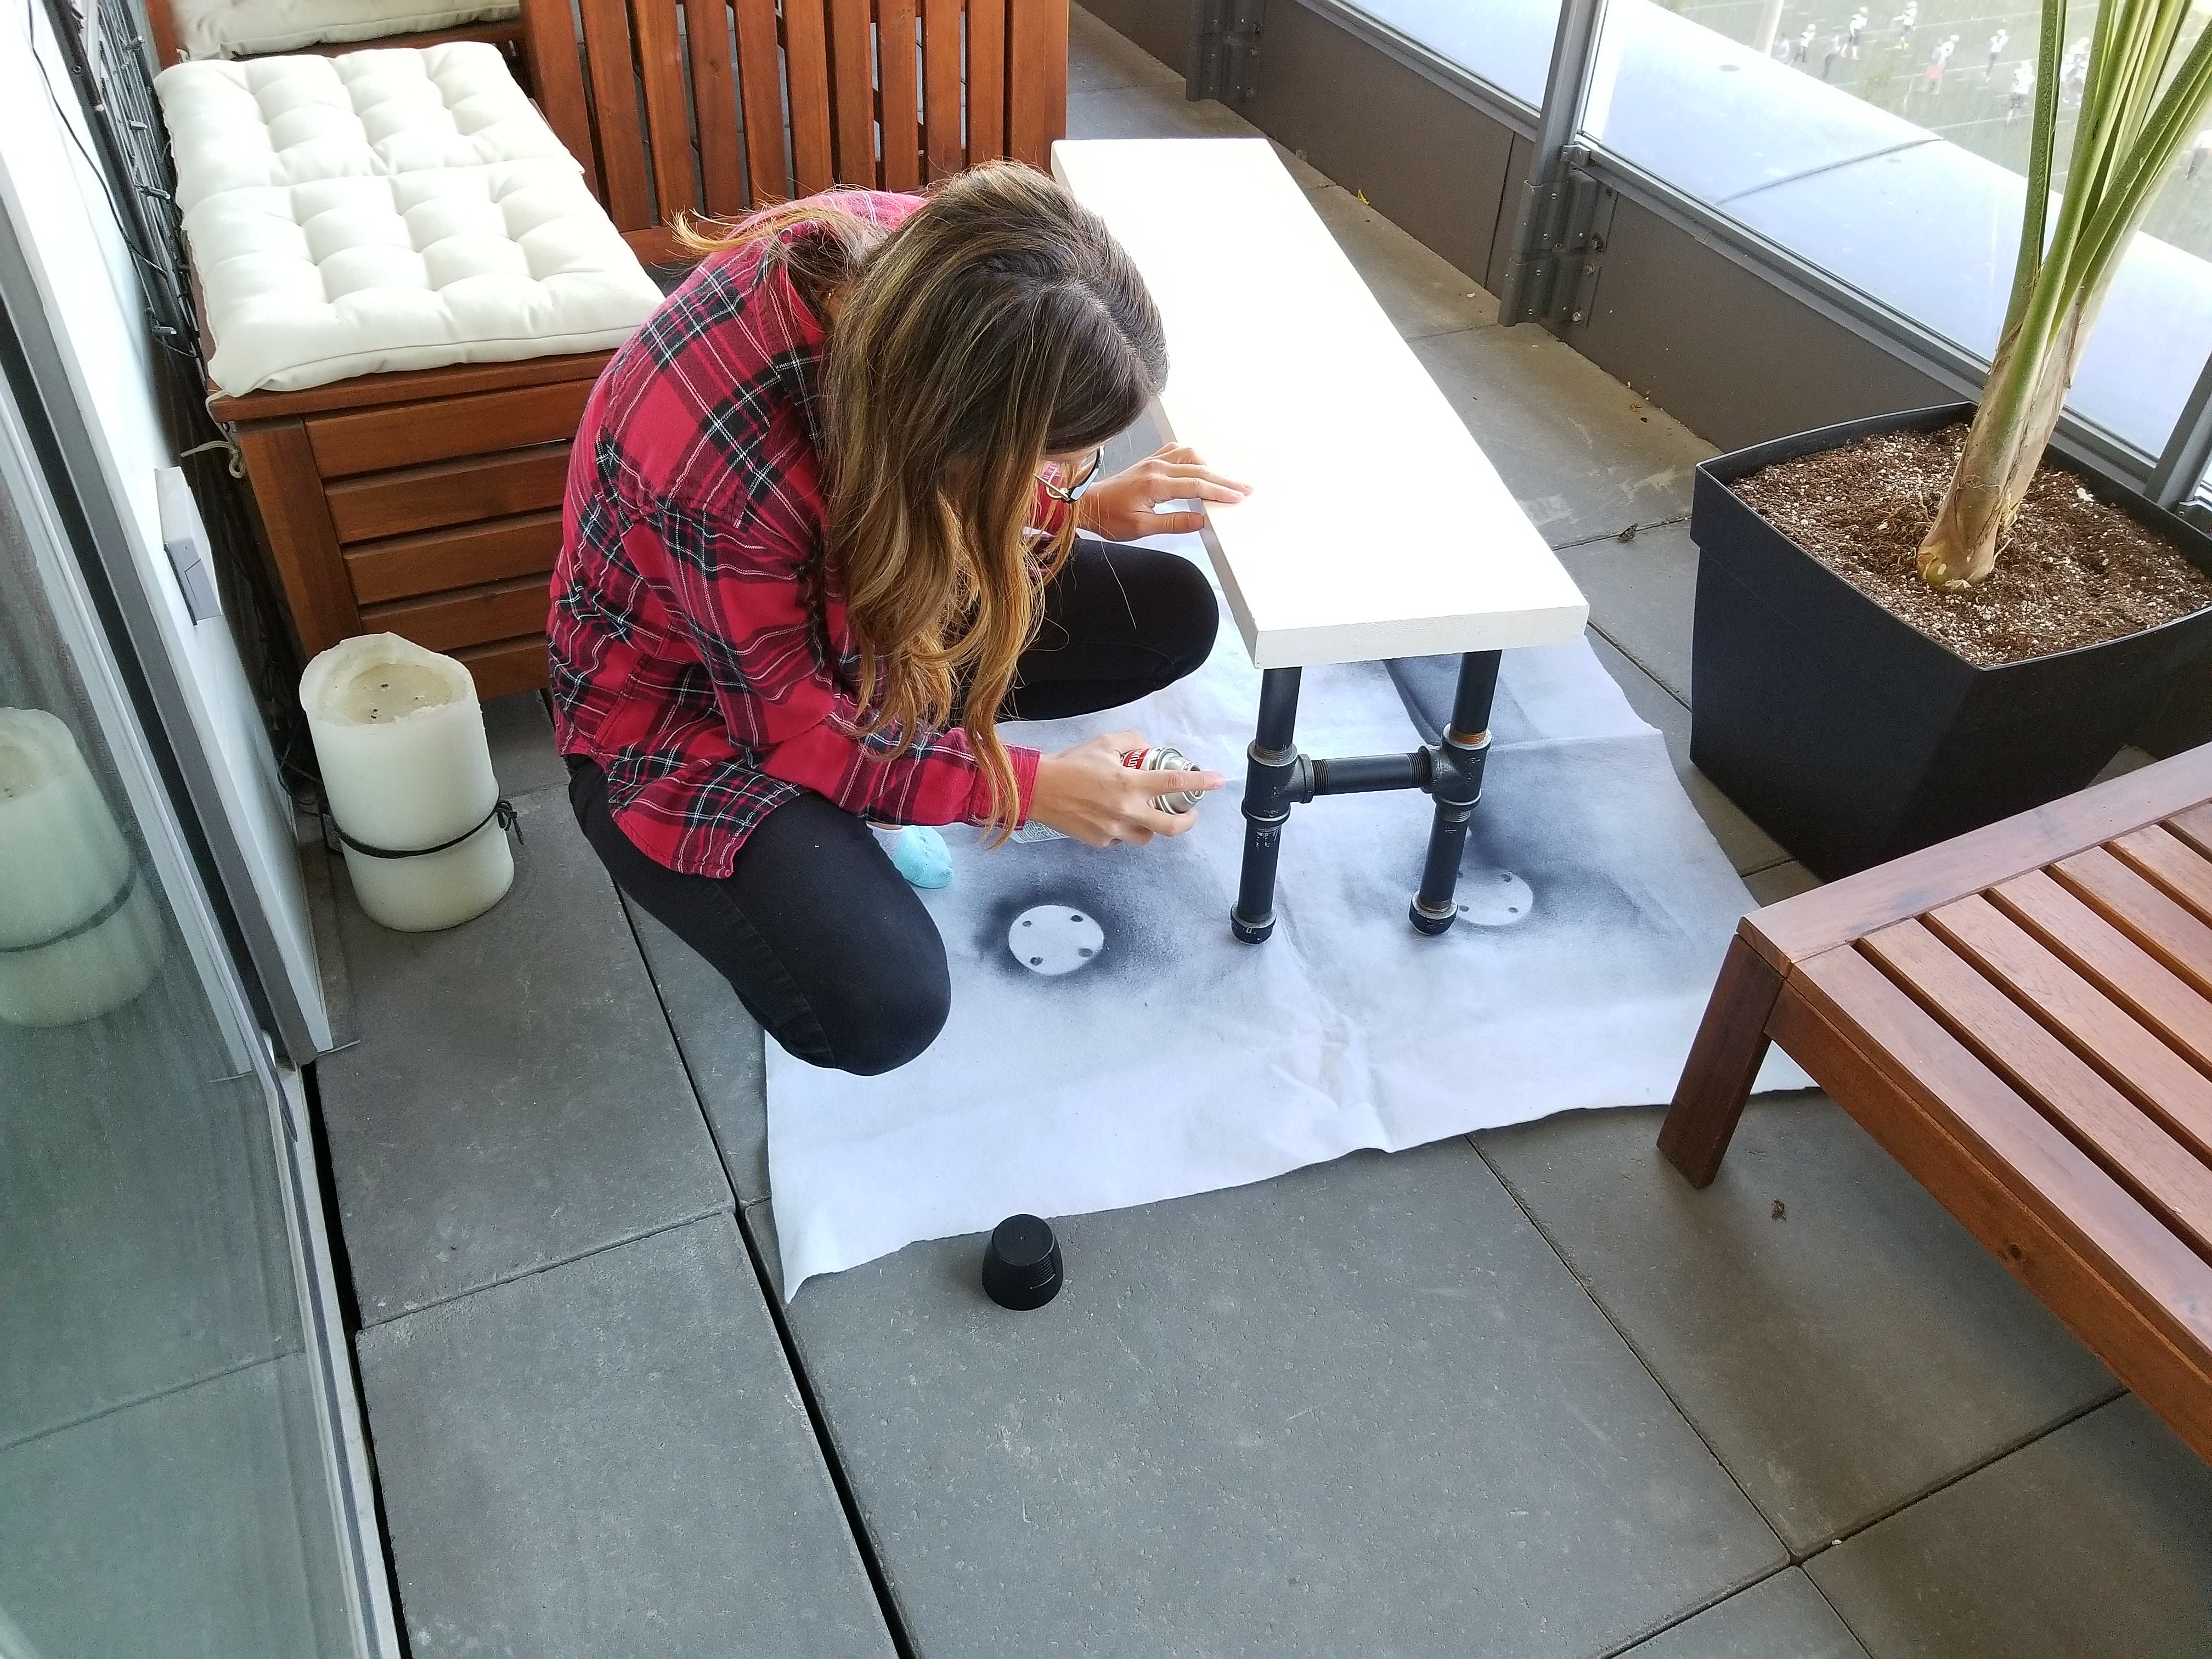
Also, you need to use a water-based spray paint for this job. If you can’t find it at the hardware store, you can find Liquitex matte black water-based spray paint on Amazon.
Note: you should spray paint prior to bolting the pipes to the benchtop. This is just me touching up after the fact.
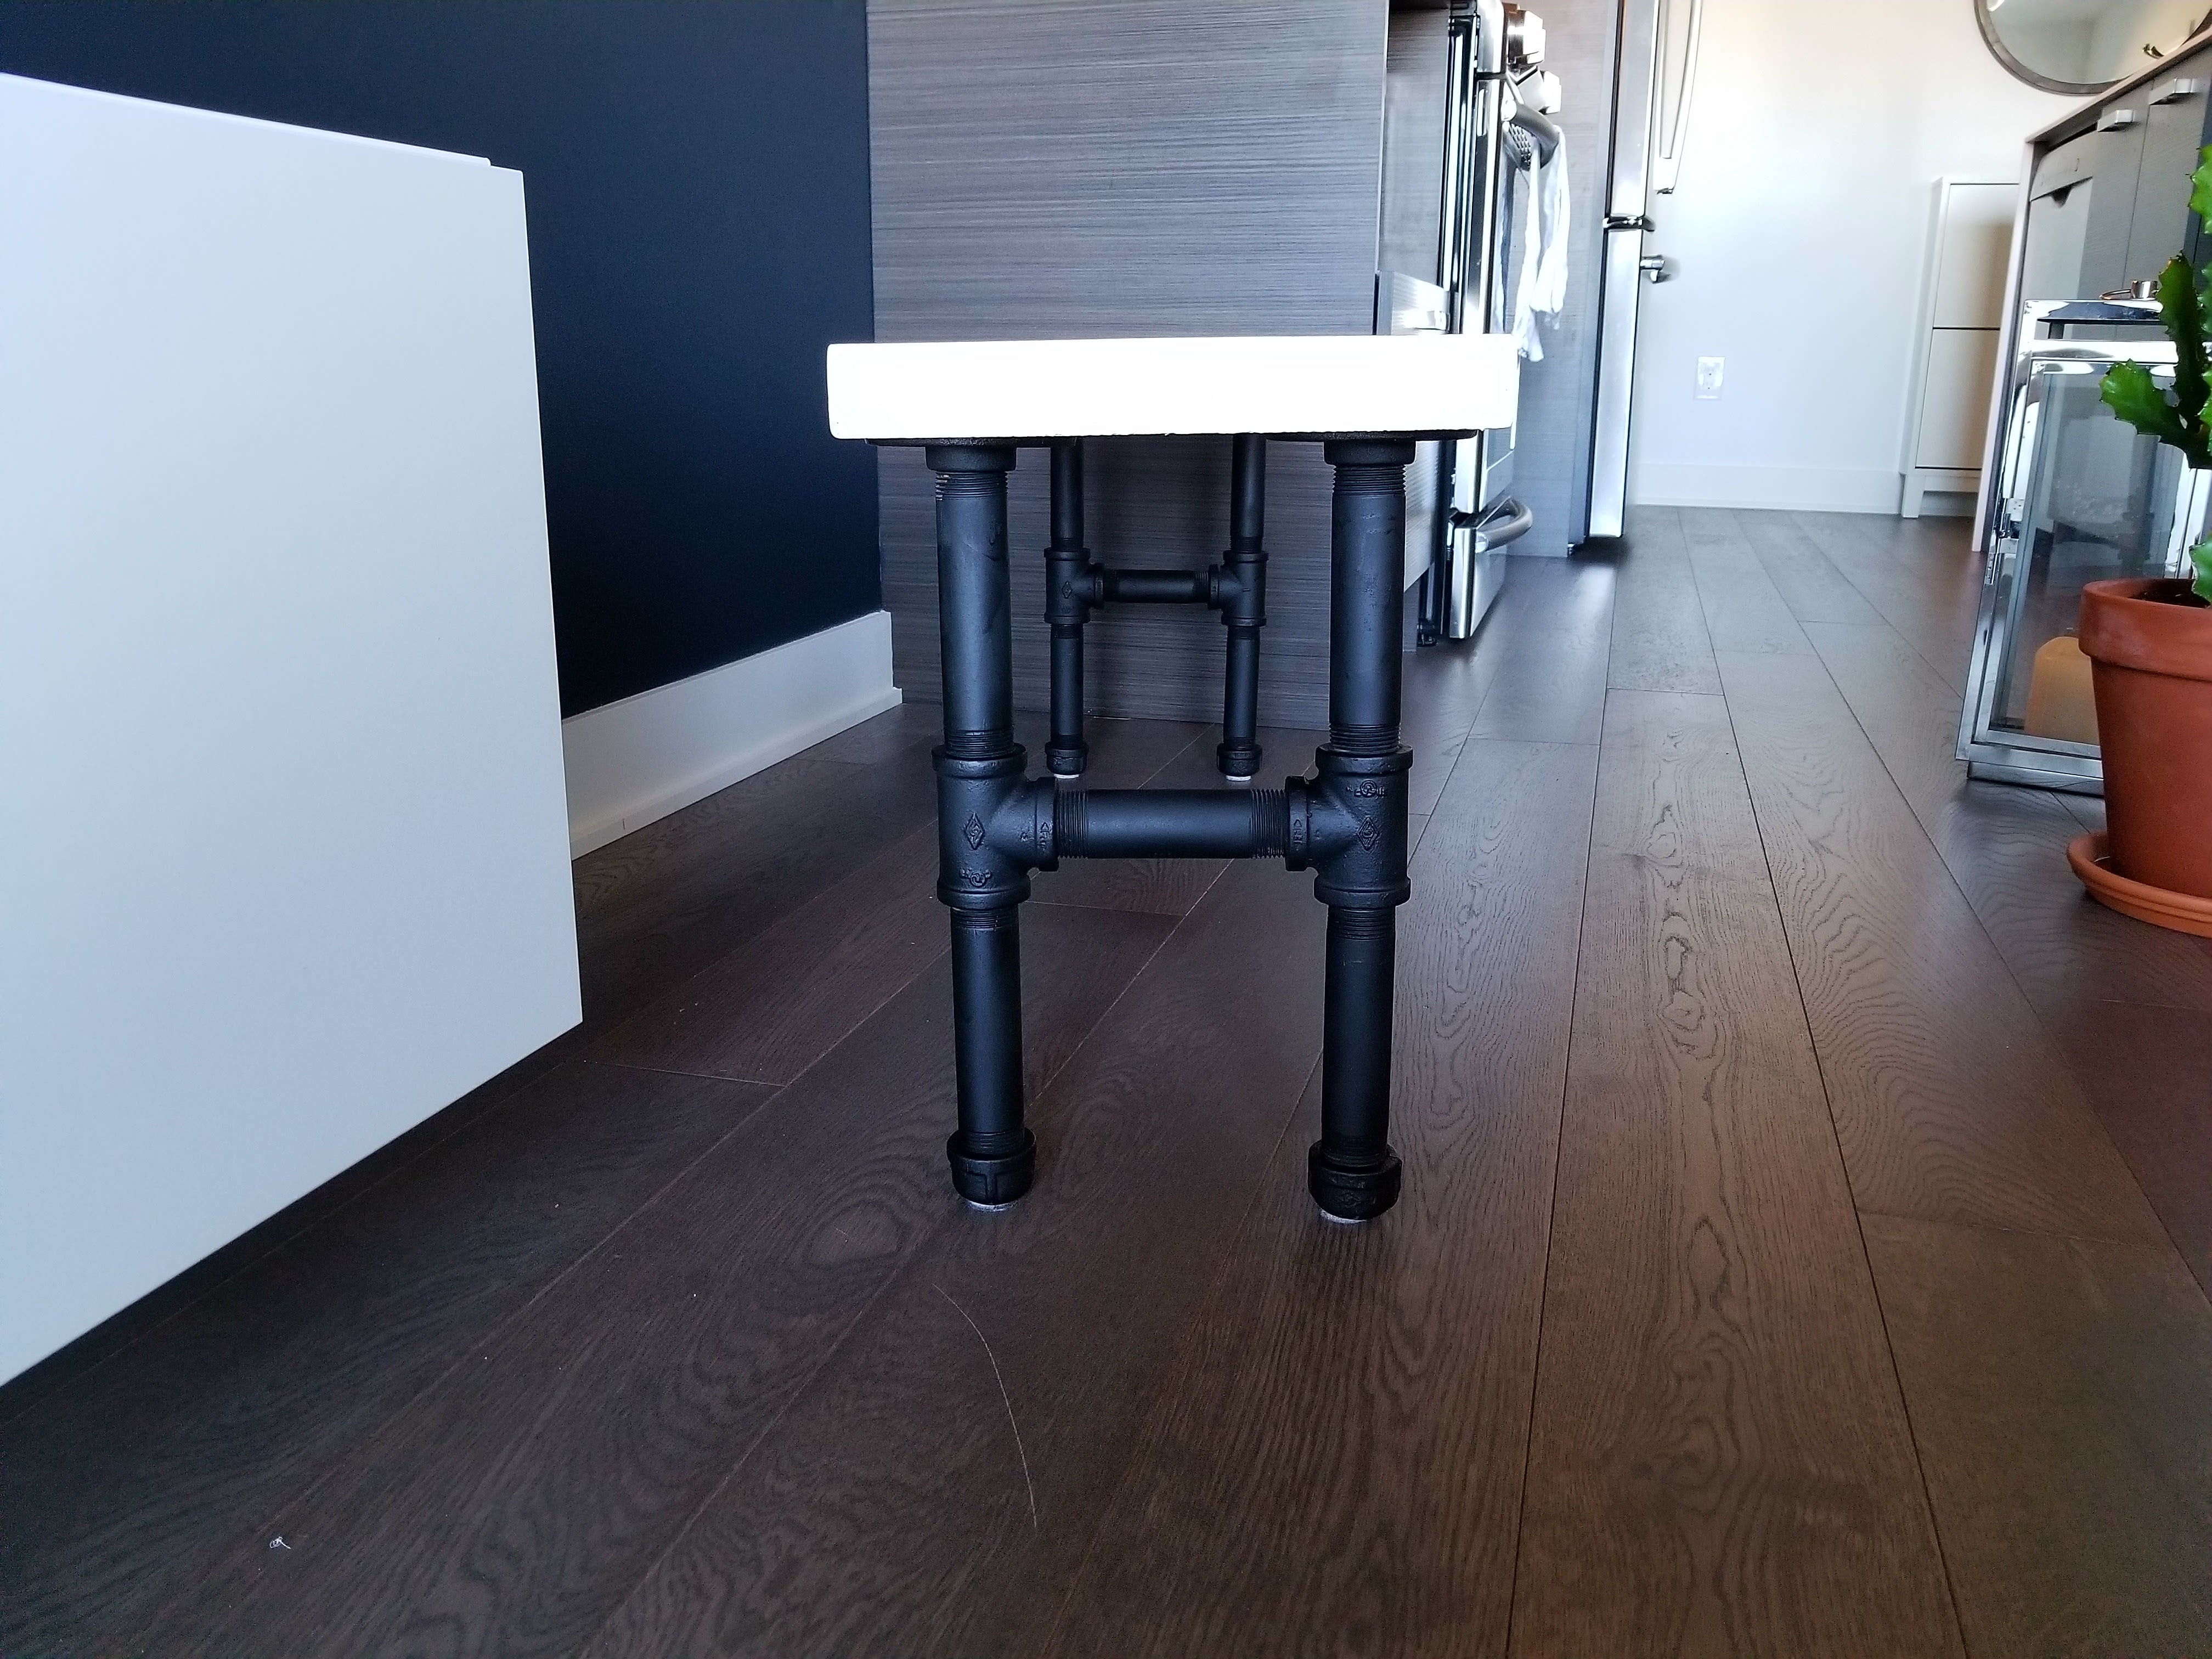
Step 4: Bolting the pipe legs to the benchtop
This is another easy step. You just need to line up the flanges (disks) on the bottom side of your bench and drill screws into the holes. Make sure your screw heads aren’t smaller than the flange’s holes.
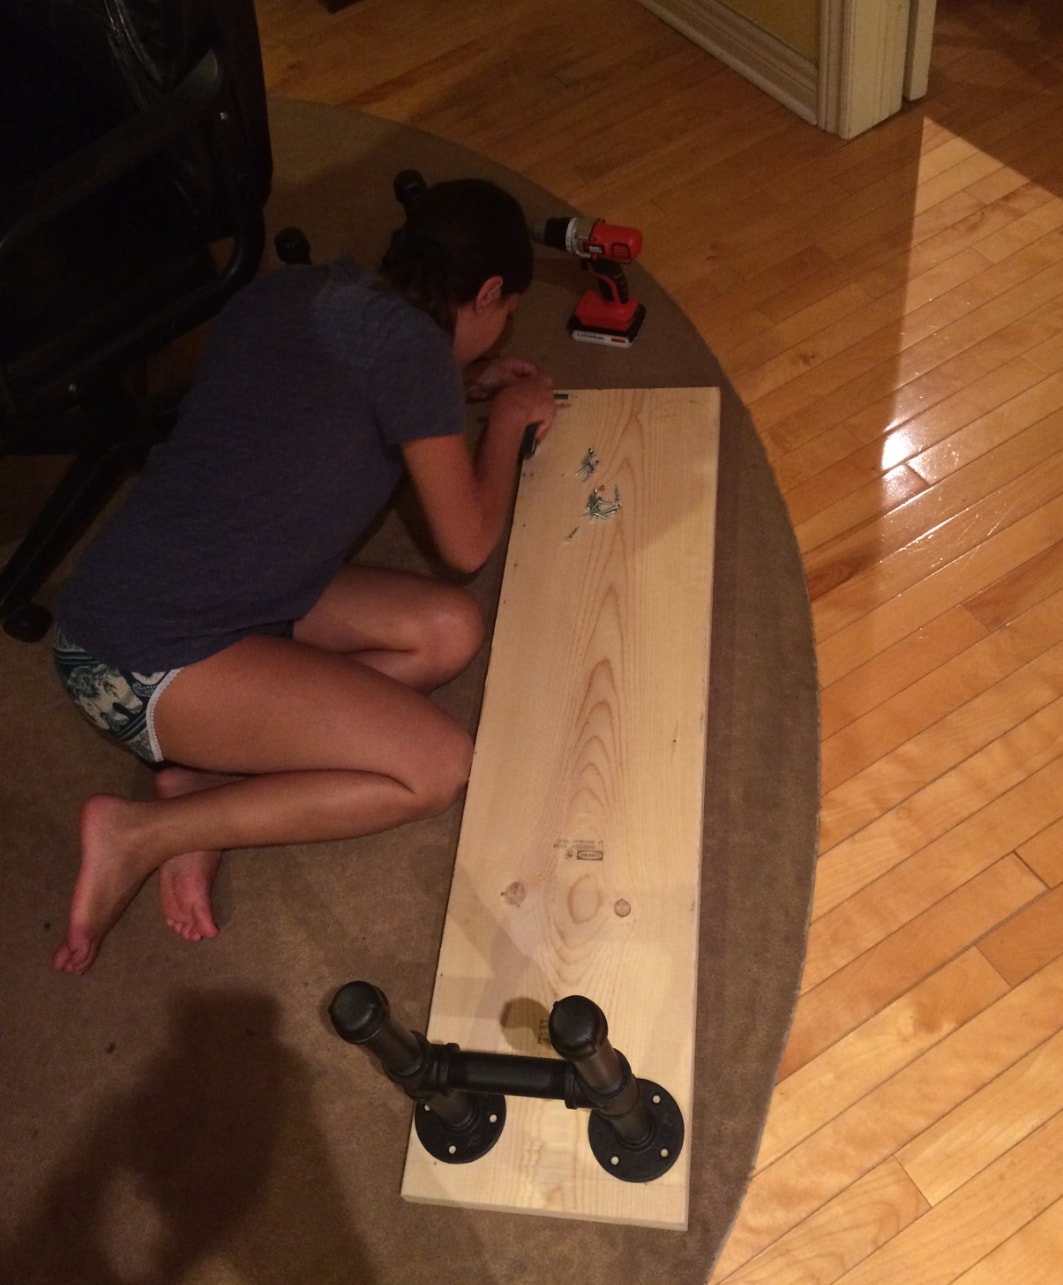
Tip: Wearing short shorts and assuming the fetal position is ideal for drilling pipe legs into your wooden bench. Trust me, I’m an expert.
Step 5: Staining the benchtop & applying polyurethane
This is the home stretch.
Use the SamaN stain of your choice to stain your industrial bench. I chose a whitewash stain color because I like that look.
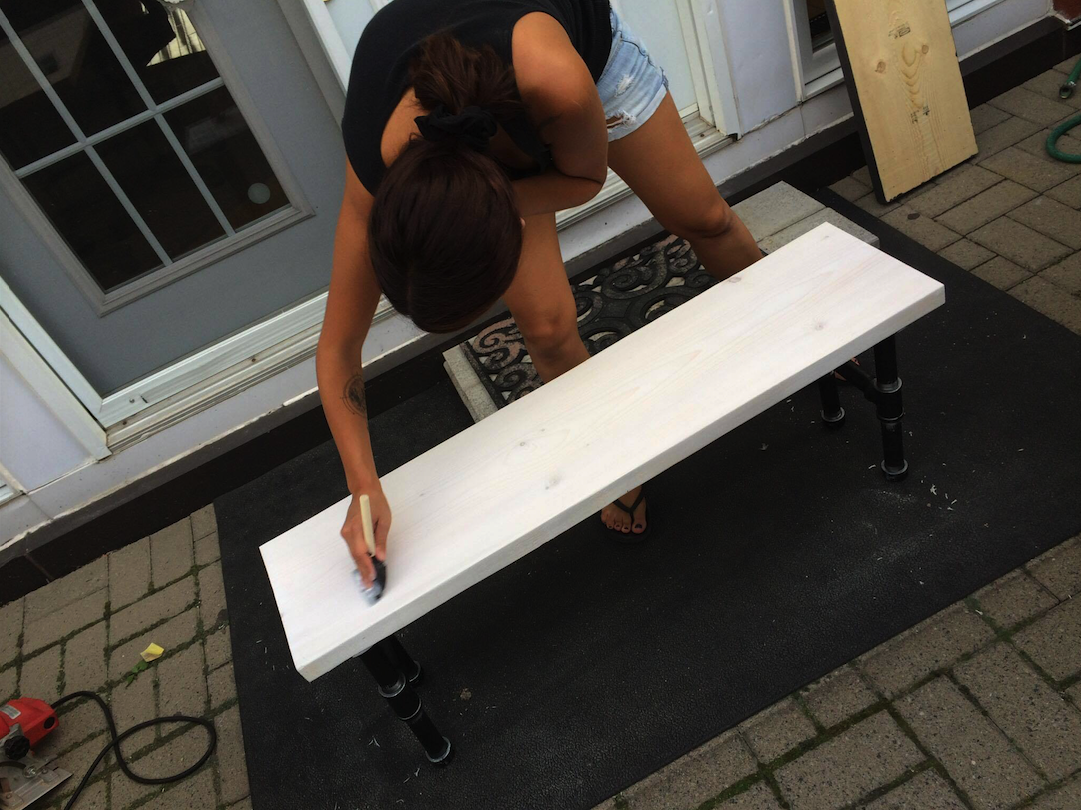
Once your stain is applied and you’ve allowed enough time for it to dry, apply 3-4 coats of clear (non-amber) polyurethane. Follow the instructions on the can for best results.
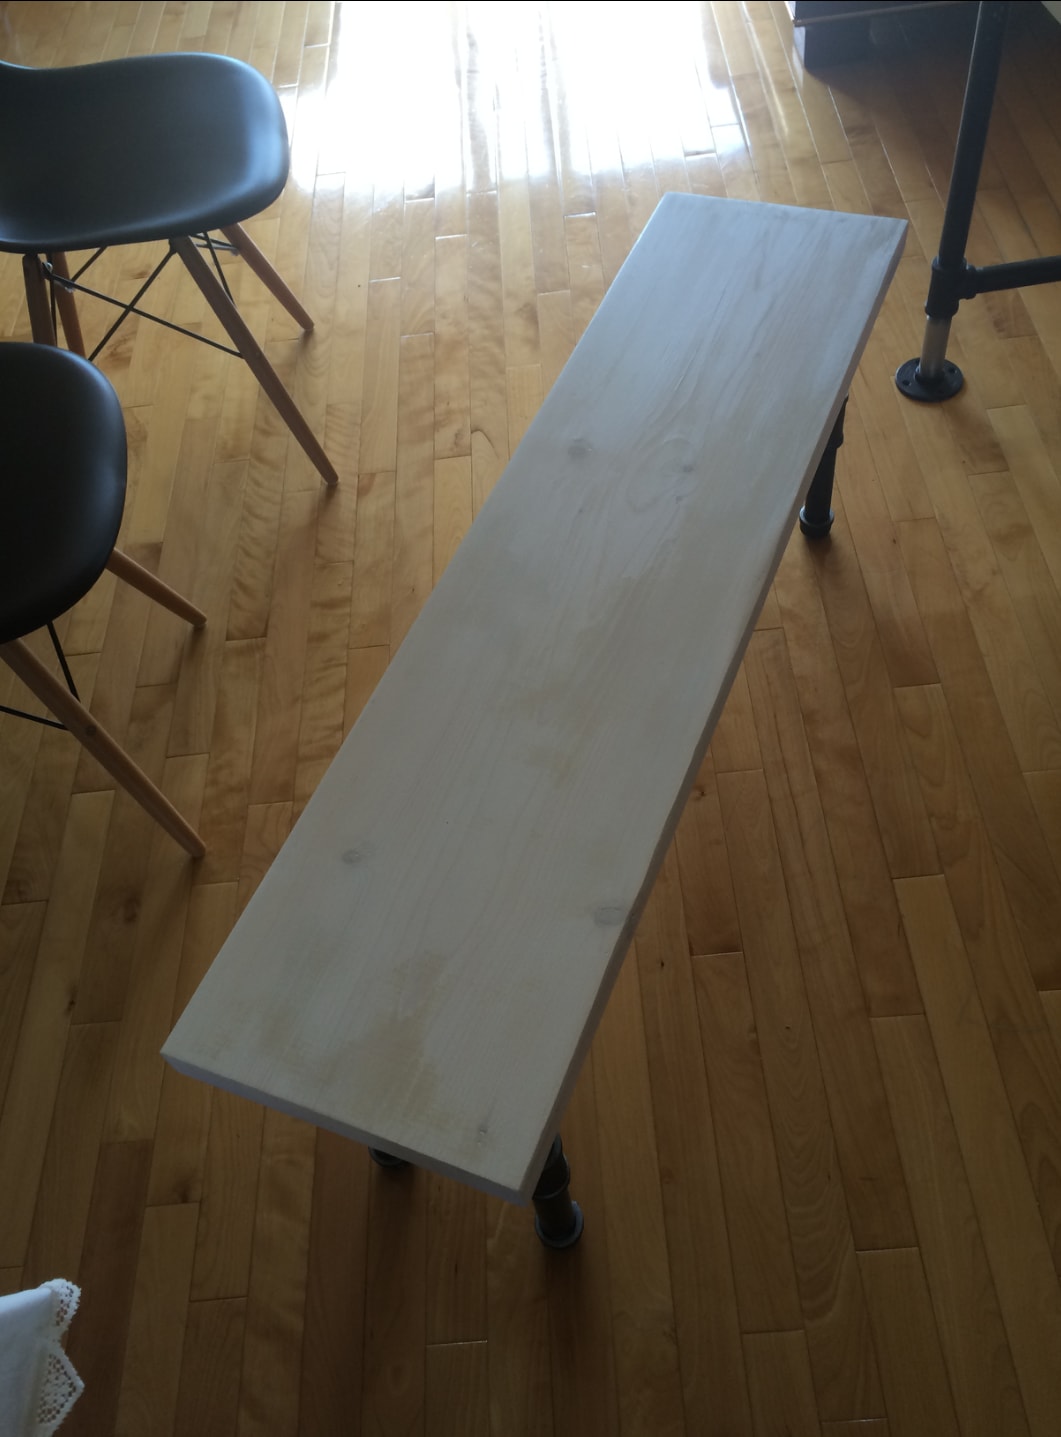
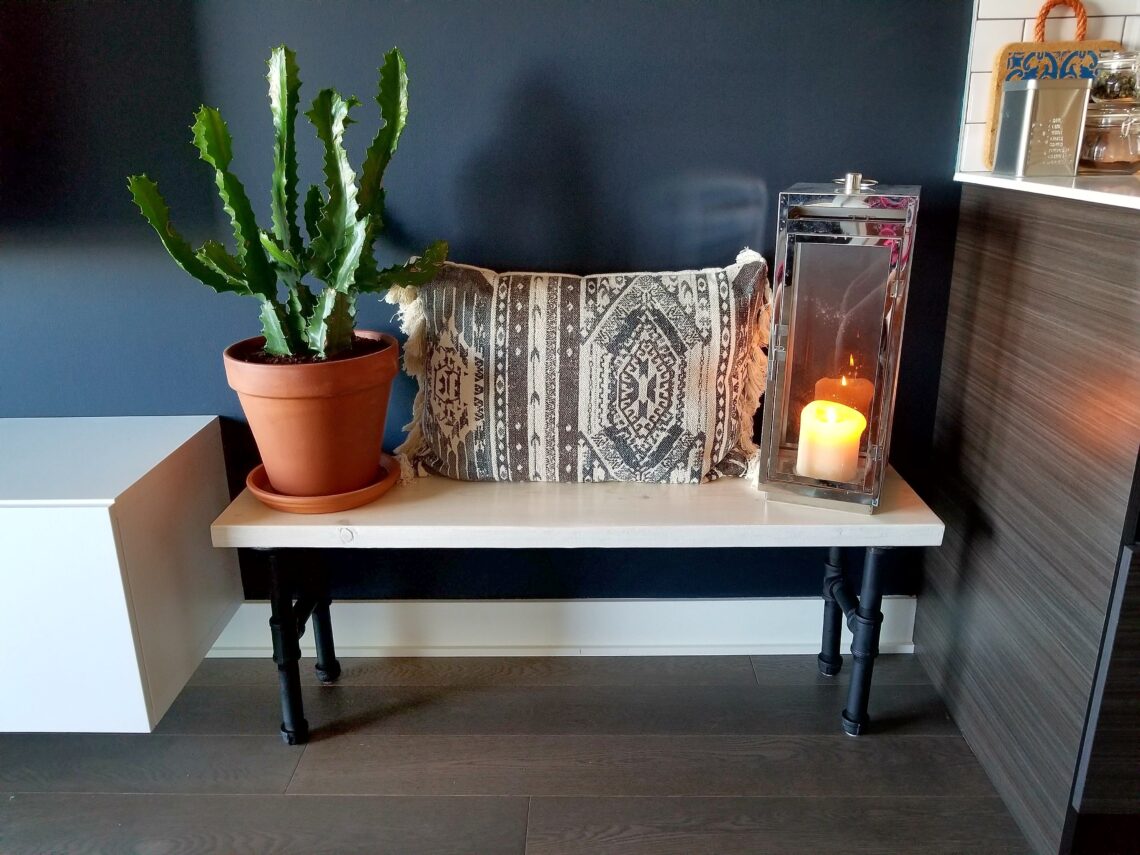
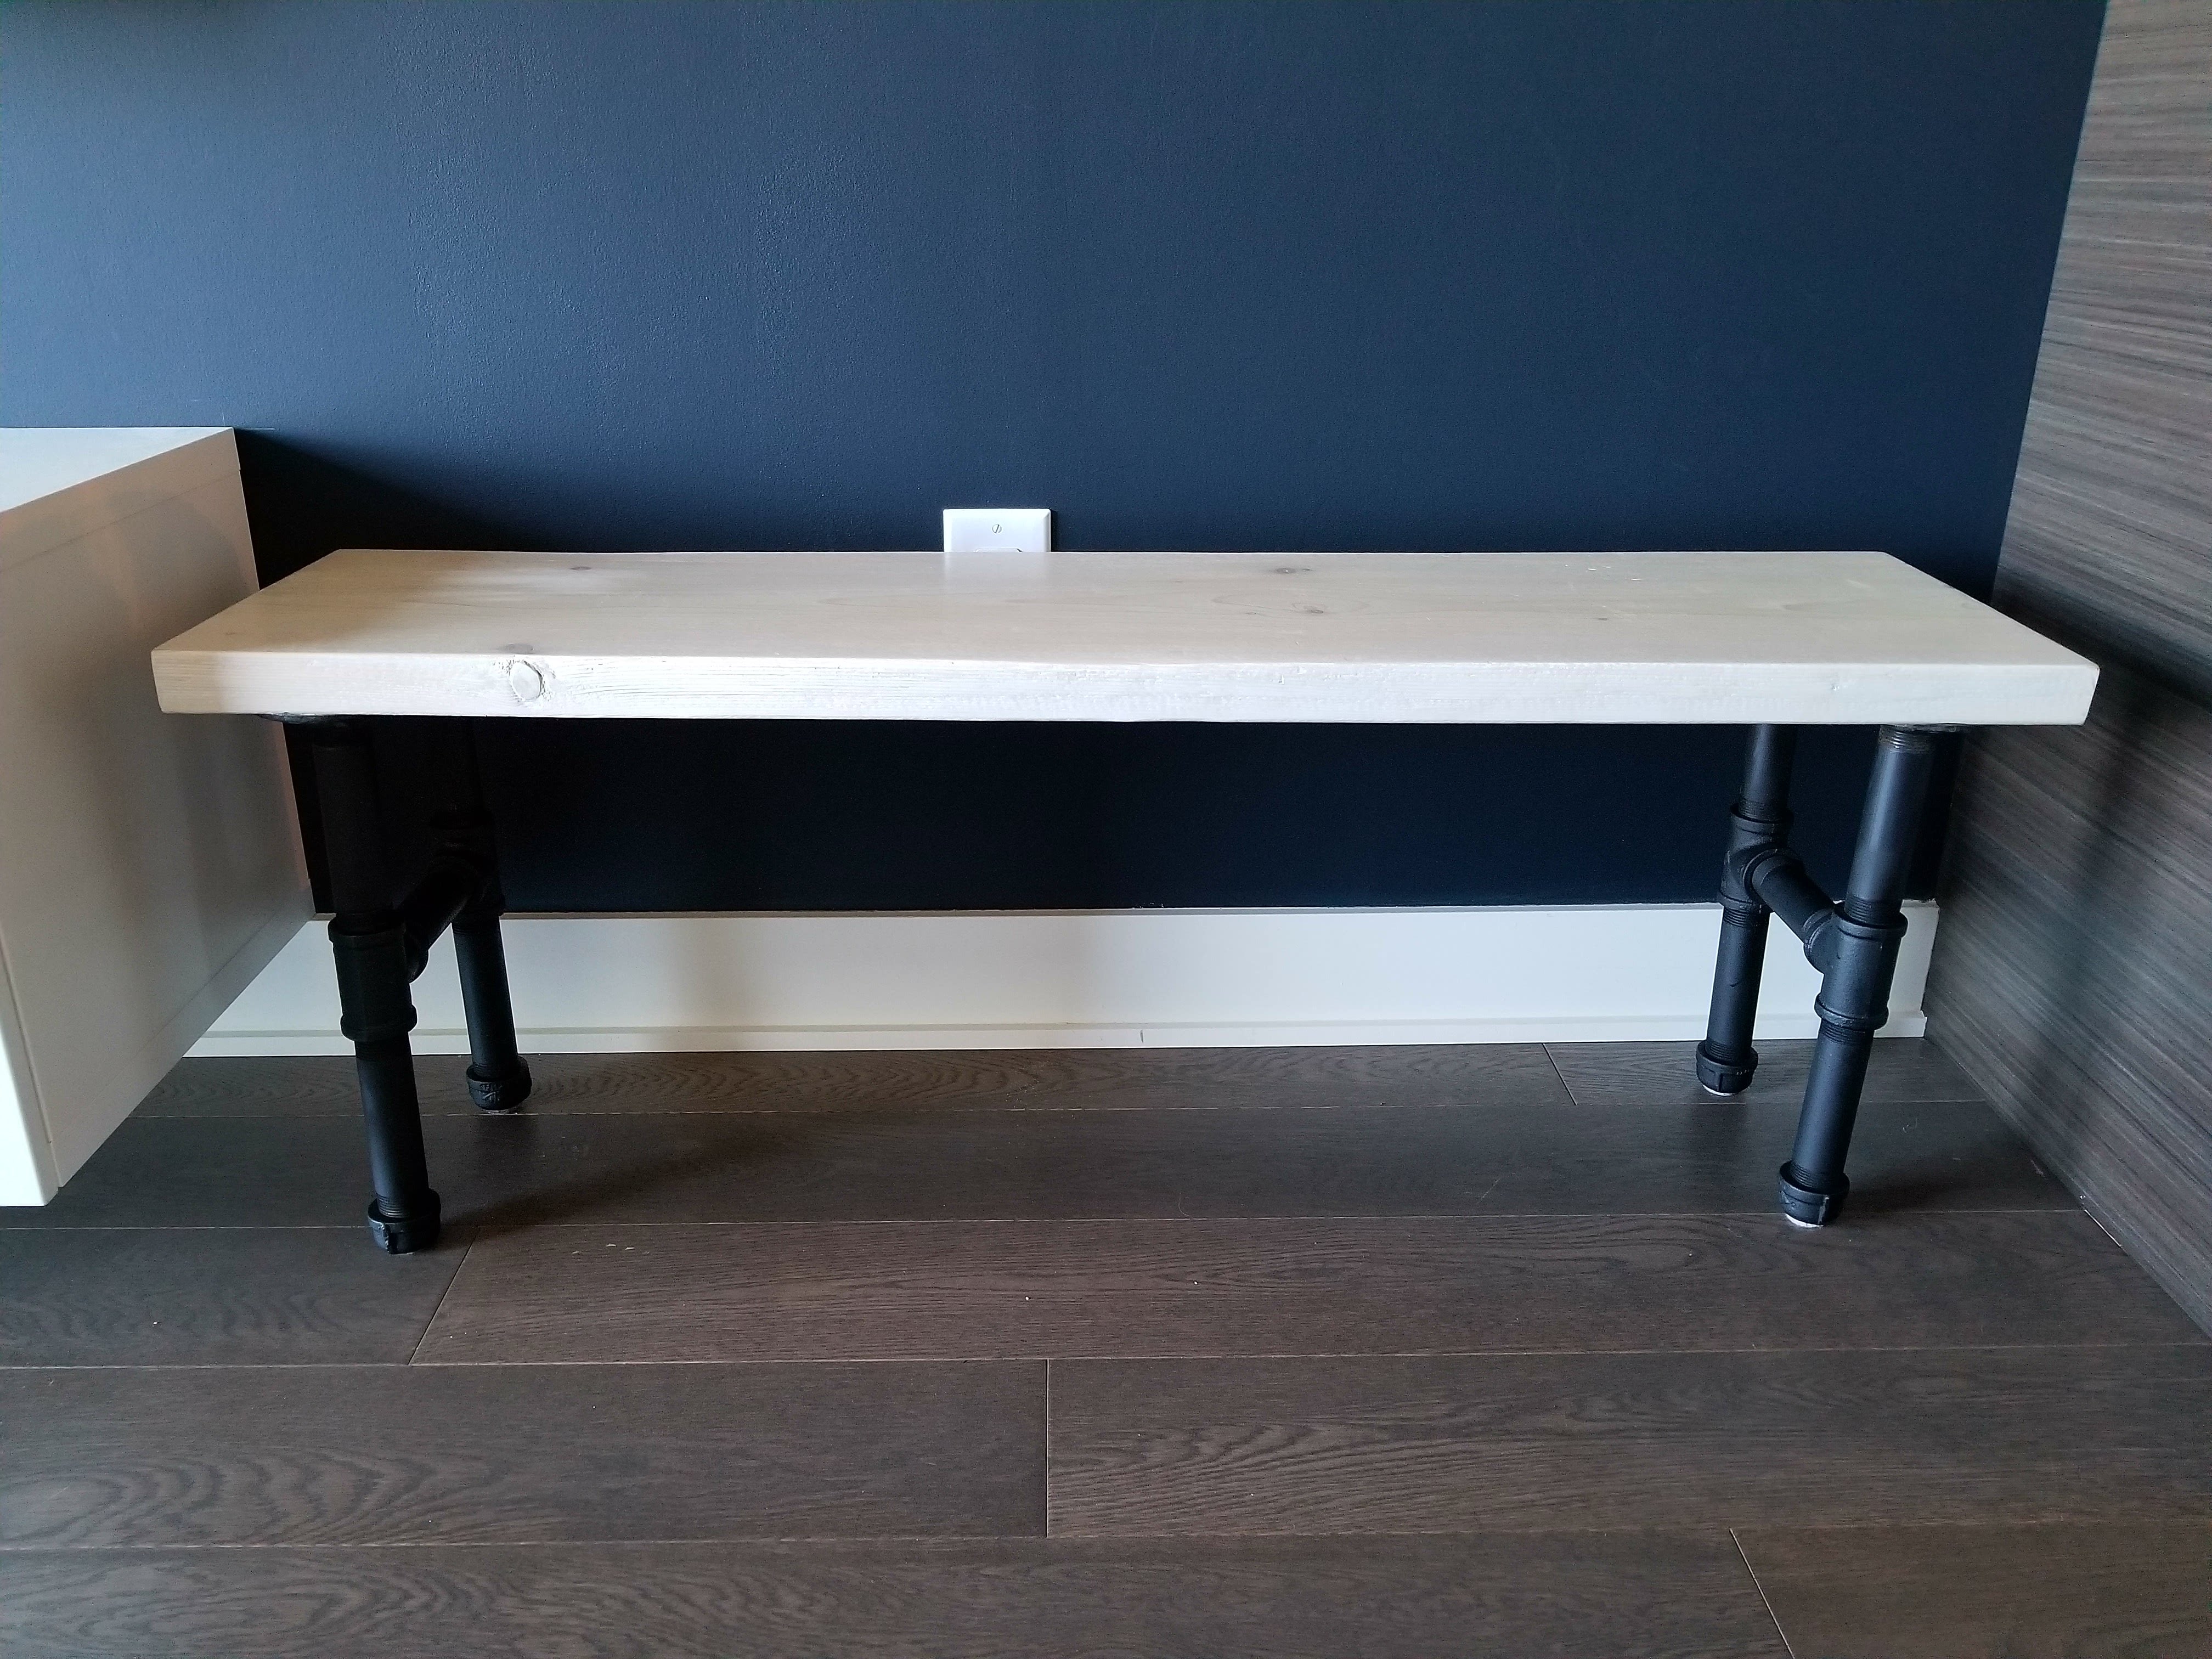
Finished product
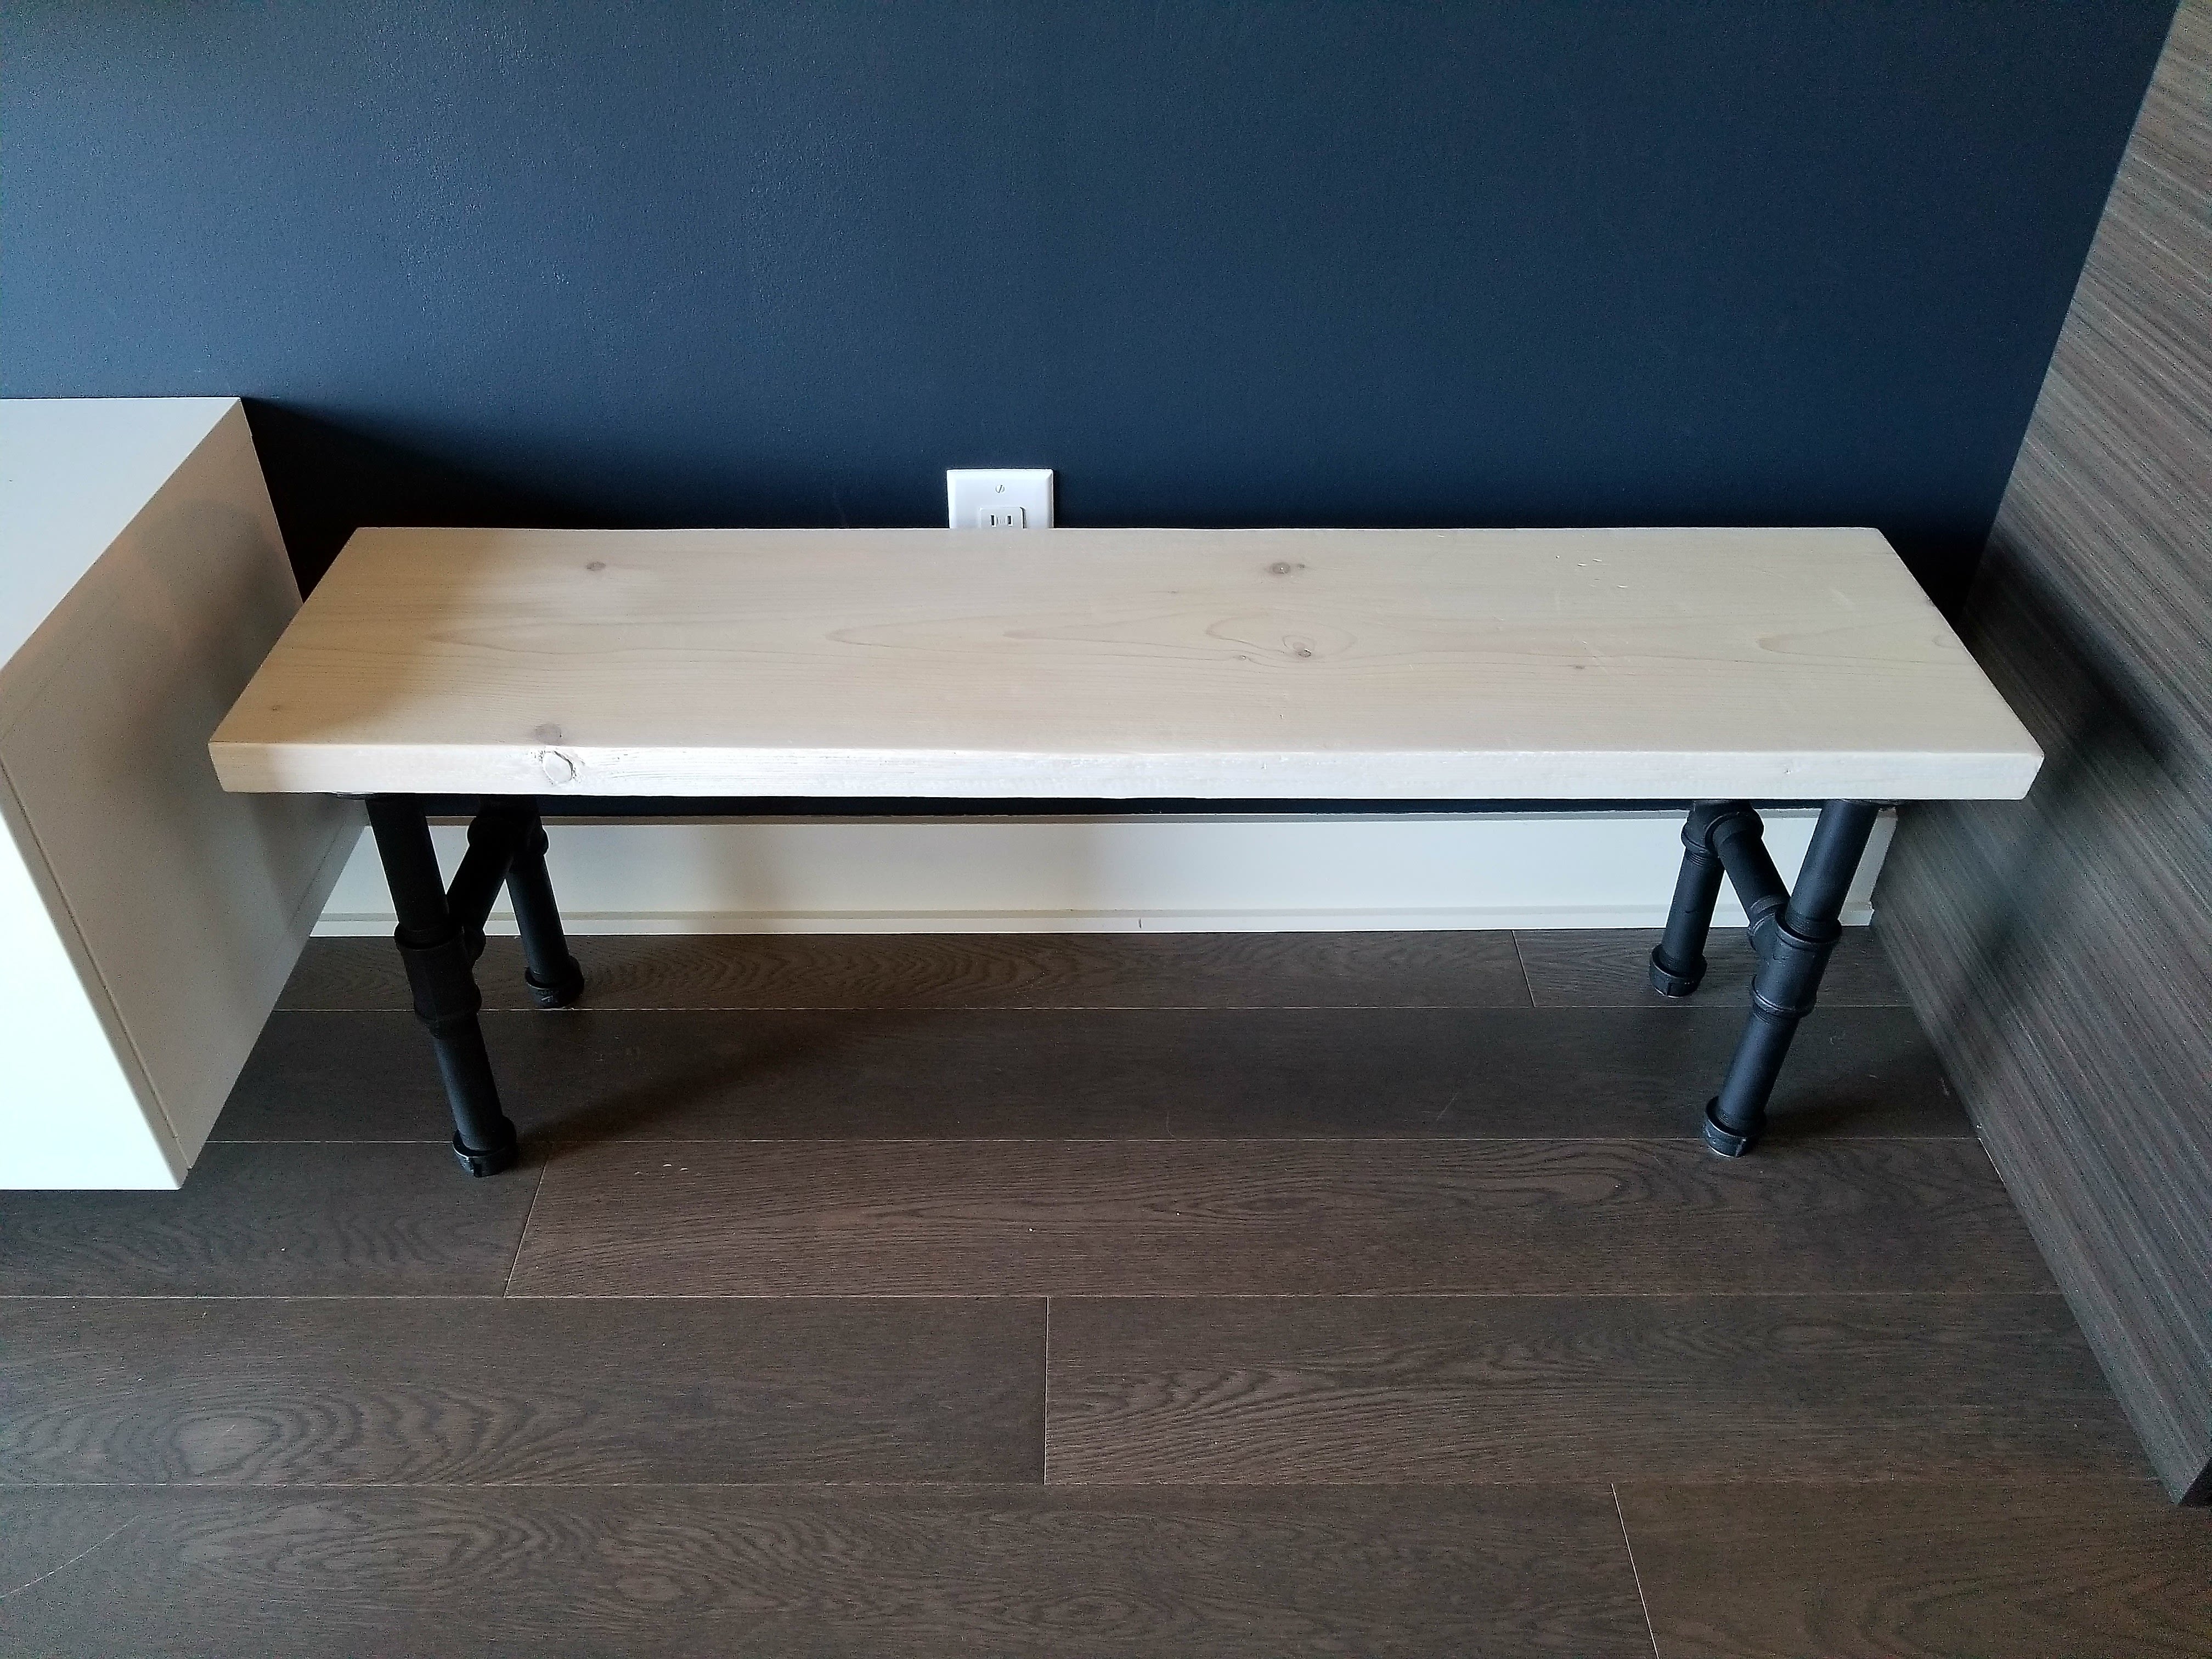
That’s it ladies and gents. You are now the proud owner of a custom-built industrial bench with pipe legs!
Final tip: Put small felt pads under each pipe leg so you don’t destroy your floors. You’re welcome.
Interested in other DIY projects?
How to make a faux brick wall
How to build and mount open kitchen shelving


2 Comments
Lisa Fleming-Philpot
Thus is good if you want to add some deco space like that in the pic. It’s cute.. Can you point me towards a bench that will match a queen bed…have storage and work for a teens room? Thank you for your time
smallspacedesigner
Hi Lisa! Thank you for your comment 🙂 IKEA actually has some great storage benches you can look into and they’re not too expensive. Hope that helps!